
How to Burn Leather – Intro to Pyrography
Pyrography is a form of burning leather to create images using a leather burning tool. This leathercrafting is similar to carving leather but instead you will use a tool that comes to a point that will get very hot.
Usually the burner will come with or allow different head pieces to be attached to create unique burns into the leather. So I recently got a hold of a leather burning tool and are going over some tips on how to burn leather.
The Burner tool

This tool we will use can also burn wood so expect the tip to get very hot. Knowing this, it may help to look for a burning tool that has a temperature control. Mine only had an on/off switch which worked fine, but definitely would get a bit too hot at times.

There are many different types and I found mine at walmart for around $15. Chandler burner tool kit is very similar to the one I picked up for $23 on Amazon.

Pyrography Wood Burning Kit | Amazon
Buy at Amazon.com
Easy to use wood burning tool comes complete with a comfort grip wood-burning pen, 8 interchangeable solid brass tips, 1 soldering tip, and a metal stand to keep your wood burner safely stored while working.
We earn a commission if you make a purchase, at no additional cost to you.
A lot of tools come with the solid brass tip attachments. These tips come in handy for adding shading or use for different size lines.


The tool itself will get very hot when setup. The average range is anywhere between 400 degrees – 800 degrees fahrenheit. And if this can easily burn leather and wood, it will definitely burn your skin.
So be careful when placing your fingers near the tip of the tool. As the heat coming from the burner will burn you fingers if they are too close.
Since the tool and tip will get very hot, you will want to avoid screwing tips off with your finger. Instead use a pair of pliers to unscrew off a tip you are finished with. Even after turning the tool off to change the tip will leave the tip very hot for a few minutes.

There are two different types of burners which will have either solid or wire style tips. The solid points tend to have more attachments that can burn stamp like images into leather. On the other hand the wire tips seem to help out for more detailed oriented pieces.
When picking a tool it really depends on how you plan to use the tool as each one has pros and cons. Also some tools can get very expensive like the TRUArt Stage 2 burner. These higher end burners will usually have wire tips and a temperature control.
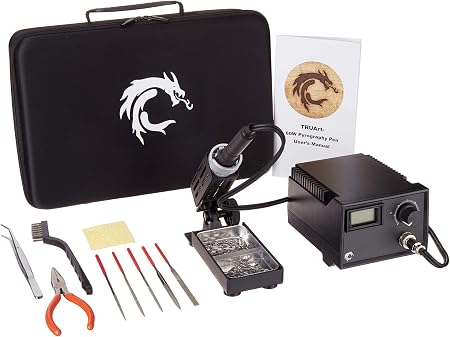
TRUArt Single Pen Professional Woodburning Detailer 60W Tool with Digital Temperature Control | Amazon
Buy at Amazon.com
$199.95
Super powerful 60W wood burner features near-instant heat response with precise digital voltage control that allows you to make minute heat adjustments so you don't have to put pressure on the tips.
We earn a commission if you make a purchase, at no additional cost to you.
07/25/2026 10:03 am GMT
So assuming you are just starting to do leather burning, you may want to stay on the less expensive side. When you get a bit more comfortable with burning leather, you may want to upgrade a bit.
How to burn leather
So you have a tool and you are ready to start getting to your leather. But you may want to hold off before jumping straight into a big project.
Just like carving leather, you may want to practice on some scraps of veg-tanned leather. This way you get a bit more comfortable with the tool and the tips.

When using the burning tool you don’t have to use veg-tanned leather but it will look much better. If you are burning chemical tanned leather, you may want to make sure there is proper ventilation. These chemicals can burn off while you are using this tool so be careful. You can also work on the underside of leather or even suede as well.
If you have a temperature control you will want to get comfortable with that as well. Since these tools are made for thicker material and even wood, you will want to test temperatures. Do you want to burn deeper into the leather with ease, or will you use it like an awl for shallow marks.
If you do not have a temperature control you will have to apply different pressure.
After you have tested and became more comfortable with the tool you can start working on an image.
Depending on what you are making it may be good to use some tracing paper and scratching the image onto the leather. To do this you will want to dampen the leather just enough to wet the surface.
Place the traced image over your leather and tape this in place to avoid moving around. Then use a scratch awl to trace over the lines of the image. This should give you an indented image onto your leather.

If it is easier and your leather is light enough you can just sketch the image straight to the leather. Use a pencil or scratch awl to mark out a design then start tracing with the burner.
Burning leather will give you a crispy line that can be dyed over or used after dyeing the leather. If you use light color dye it may not cover the burn marks as they do create a very dark mark into the leather.

This technique is much different than carving leather as it can allow you to create very detailed images. The burner gives texture to the leather in lines similar to carving but adds an extra crisp.
Tips for leather burning
When using a leather tool you will want to avoid stopping in the middle of a line. This will create a deep pit in the middle of the line that will show very easily. To avoid this, as you are tracing with the burner, if you need to stop, lift up in motion. Doing this will create a thinned out line to easily start go back and start the where you left off.
Having a steady hand will take you a long way as it will give you clean marks. Keeping your hand to run the tool across the leather with the same speed and stability will give you neat uniform line. This is much easier said than done, but this is the very important.
Alternatively you can use the tool as you would sketch a drawing. Doing this will make the lines come out a bit rough but can look very nice if done throughout the whole project.
If the tip seems to be having a tough time burning the leather you may have to clean off the tip.

To do this you can use some sandpaper to lightly scrape away the burnt leather. These tips are very durable so using the sandpaper will not harm them too bad.
Using metal stencils can also greatly help create near perfect designs to easily trace and fill while using. There are many different types from letters, numbers, Celtic designs, animals and floral designs. These stencils can make the process of burning leather much easier. If you are making identical leather crafts that need the same images, these may be very handy.

Aleks Melnyk #37 Pyrography Stencils | Amazon
Buy at Amazon.com
$15.95
Metal journal stencils "Celtic Knot" - easy to use, perfect choice for beginners, professional users and hobby enthusiasts.
We earn a commission if you make a purchase, at no additional cost to you.
07/25/2026 05:03 am GMT
Lastly, like carving leather, avoid going too much at an angle with the burner. This will burn into the leather from the side and cause the leather to have a flap along the line. This can be very annoying although you may be able to burn off the excess.
But going too far at an angle could lead to the rod part to burn into the leather.

Finished
After your burning is done, be sure to apply some type of finisher sealant as you would for any leather crafting. This will prolong the life of the burn marks.


Kiwi Saddle Soap | Amazon
Buy at Amazon.com
$18.08
Features a traditional blend of ingredients which cleans, softens and preserves smooth leather.
We earn a commission if you make a purchase, at no additional cost to you.
07/24/2026 07:00 pm GMT
Like I said, this is our how to burn leather introduction but hopefully you have taken away a couple tips to help you start pyrography. Let us know how you did on your project and if there are any tips to help us out for myself and others.
This is also an amazing video by Snowdeer burning leather very nicely!