Making a Key Fob
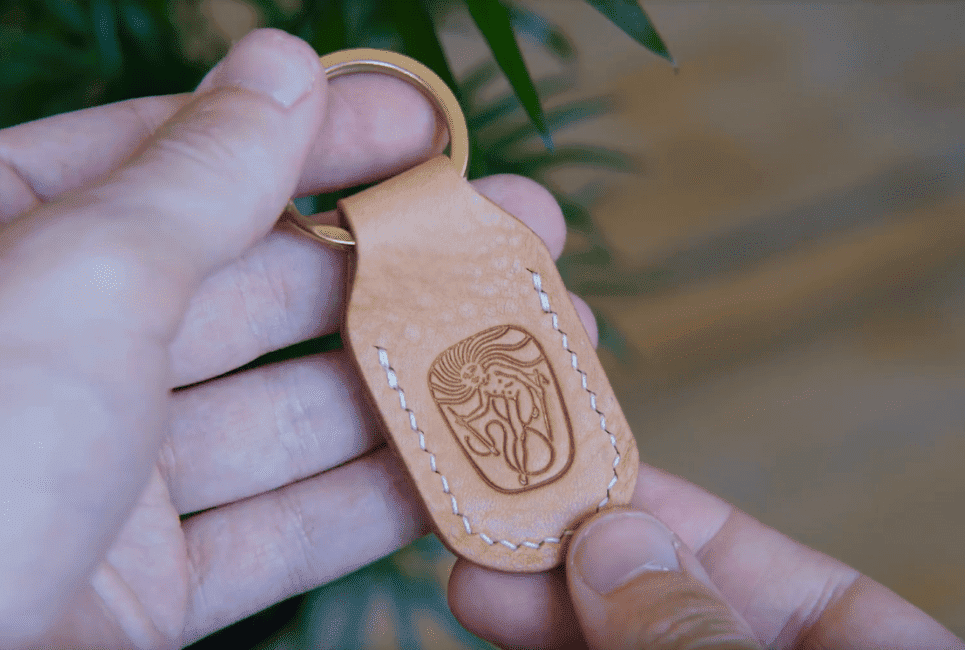
As leatherworkers, we know the value of a good key fob. Sure, I bring my wallet or bag with me most of the time I leave the house, but my keys are with me 100% of the time. We have a saying here at Sunhouse Goods: if you carry it every day, you should be proud of it. Enter the humble key fob, to which this philosophy applies in spades.
With this key fob, our aim is to enhance the rituals of daily life without distracting from them. Every time the recipient of this fob handles their keys, we want to provide them with a pleasant, tactile reminder to appreciate small details. Good leatherwork has a tendency to do this.
This pattern is a lot of fun to make, and I highly recommend that you give it a try. If you’re a beginner, this is a very accessible project that makes for great practice. If you’re more experienced, you’ll find this to be a meditative process that culminates in a great gift.
Materials
- 4.5 oz vegetable-tanned leather. Our aim here is to highlight the material and allow it to speak for itself, so choose high-quality leather that you’ll be proud of. I chose natural Missouri from Conceria La Perla Azzurra for this project because of its wonderful patina potential – a project like this will be handled and fiddled with often, and it’ll be great to watch that beautiful wear story accumulate with time.
- Split keyring. I suggest brass – even better if you can find raw, natural brass. I really like these Japanese brass rings from District Leather Supply.
- Linen thread. I choose Meisi Superfine linen thread for all of my projects. Their M50 size is perfect for use with pricking iron spacings from 3mm to 4.5mm. I suggest running your thread through a beeswax cake and quickly pulling it through a piece of cotton canvas to melt the wax into the core and remove excess.
- Contact cement. I always suggest using a water-based cement. Avoid solvent-based cements like Barge to protect your lungs, especially indoors. Aquilium 315 or Ecostick are both excellent choices.
- Wax, gum tragacanth, or water. I suggest Tokonole, but beeswax, gum tragacanth, or water will also work in a pinch.
- Cotton canvas or edge slicker. To achieve a healthy, shiny, burnished edge.
Tools
- Printable template set. The printable templates included in the instructional pack are calibrated to perfectly wrap around a split keyring. I highly recommend downloading the template to get that perfect fit.
- A good knife. You know what you prefer. I love straight-bladed Japanese skiving knives for patterning, but choose whatever you’re most comfortable with.
- Scratch awl. For marking patterns and measurements.
- Pricking irons or sewing awl. For this project, I chose 4.5mm French-style irons from KS Blade. A two-tooth iron or sewing awl is required for rounding curves. In a pinch, you could use an awl for all of the stitching holes on this project, though I would strongly recommend a good set of irons for cleanliness and consistency in your stitching.
- Maul or mallet. To strike your pricking irons. Weighted mauls with nylon heads are ideal. Don’t hit metal with metal – protect your irons!
- Edge beveler. It’s in the name. The smaller the size, the better. I use a size 0 beveler from Palosanto Factory.
- Needles. Harness needles are ideal for their blunt tips. I prefer John James brand harness needles.
- Stitching pony or clam. To hold your work in place while you saddle stitch. In a pinch, you can squeeze two books together with your knees.
- Hammer. To flatten your stitching. Choose something with a smooth, clean face to avoid marking your leather.


