7 Different Ways To Stitch Leather By Hand

When stitching leather it is good to be able to have a couple different methods to choose from. These seven different ways to stitch leather will help you create a more unique finish. They will also help you get around a corner, sew two pieces next to each other or just create a new look.
So we explained before how to hand sew with the saddle stitch but let’s go over some more techniques. If you do not know how to thread a needle or line up your stitch you might want to start with our saddle stitch reference. That will go over some basics of getting started when sewing. Plus most of these methods will take on the same beginning steps as the saddle stitch.
Our Recommended Kit
273 Pieces Leather Working Tools and Supplies with Leather Tool Box | Amazon
Buy at Amazon.com
$95.69
Leathercraft stamping tools are suitable for beginners and proficient. And it can be used as a wonderful gift for parents, family, friends, especially for DIY hand stitching lovers.
We earn a commission if you make a purchase, at no additional cost to you.
07/10/2025 04:01 am GMT
Different ways to stitch leather
#1 The Single Stitch
This stitch can help you speed up your sewing if you are having trouble with the saddle stitch. It is a very simple method of stitching and basically has the same look as the saddle stitch but only requires one needle.
You can start this stitch one of two ways.
First you can take the thread and place it through the needle, but you have to create some sort of knot. This will allow you to tightly pull the thread and avoid having the thread pull through.
This is done by placing one side of the thread through the eye of the needle.
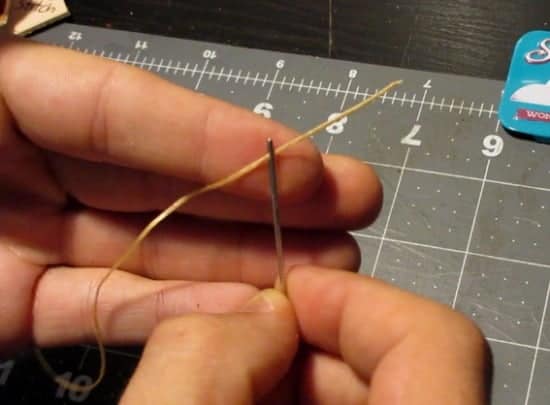
Next you will take the end of the other side of thread and place onto the needle.
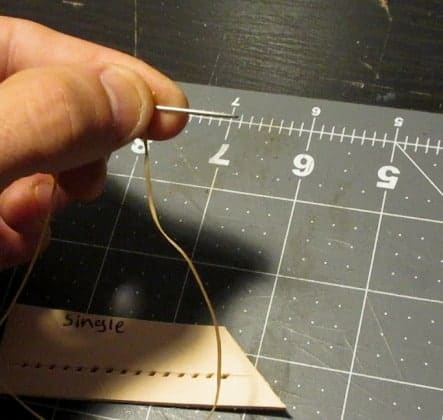
Then wrap that thread around the needle about 3-5 times.
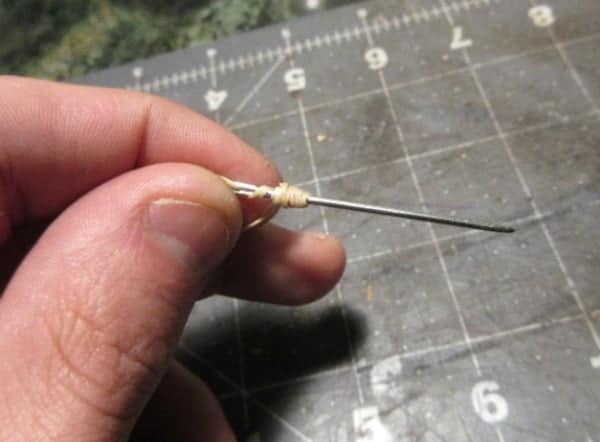
Then take that wrapped thread and pull up until you get past the eye and other side of the thread.
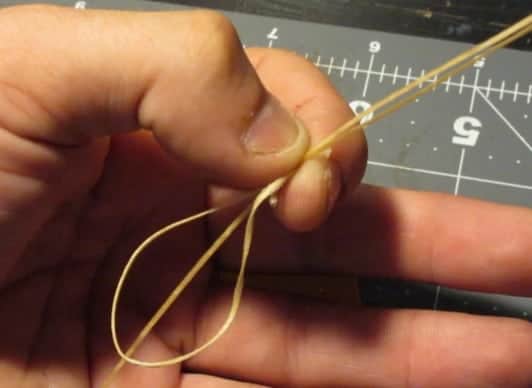
After pulling the knot you should have the knot by itself at one end of the thread.
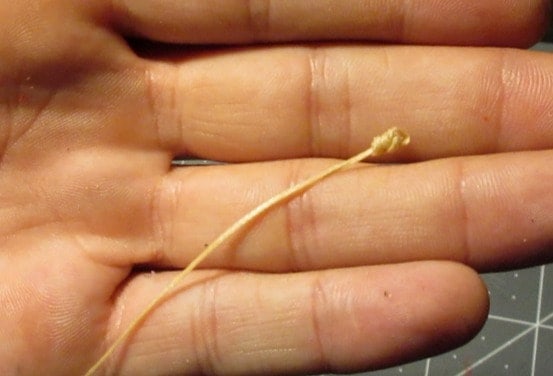
Now you will lock the piece of thread through the eye onto the needle.This is the same as doing it with a saddle stitch. Take the thread and split it onto the needle then pull up until it is past the eye.
This will allow you to pull through the beginning hole while the knot stays in place on the backside.
You want to avoid tying a knot at the end like you would do sewing regular fabric. If you were to do this, your thread will be very bulky as you would be using two layers going through the holes.
The other method which looks a little better in my opinion is to thread the needle as you normally would and run it through the hole.
You will let about an inch or two hang on the backside to avoid going all the way through the hole. As you sew through the holes you will hold the excess piece of thread. You’ll have to create a few stitches back and forth until you can freely let the thread hang.
But this will make it easy to just burn off and press to the leather instead of having a small knot.
When stitching with a single needle you are going to start in the second hole and run your thread through.
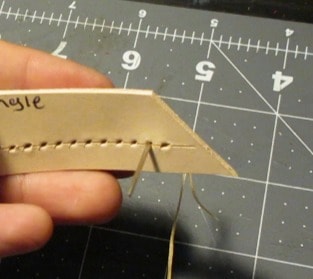
Once through you will go back to the first hole then skip to the third hole.
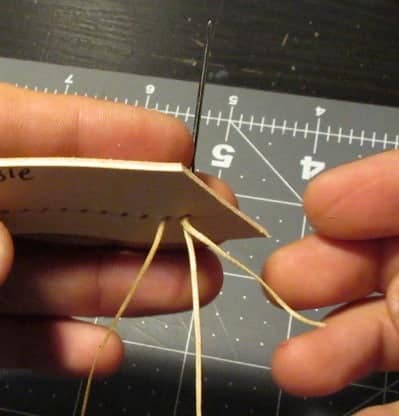
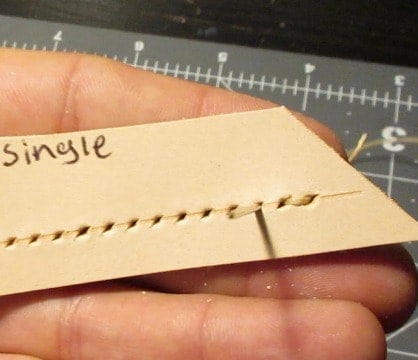
You will continue this process until you have completed your stitching.
An easy way to remember is to start one ahead go back one and then forward two. One step back, two steps forward and repeat until you get to the end. You can go back and forth a couple times to create a secure finnish.
Cut off the extra thread and burn into the leather.
#2 “Z” stitch
To do a “Z” stitch you will start the same way as the single stitch with your threading.
Your choice of how you want to begin the stitching process. But since this stitching will go over the edge of your object you could use the knot method and start on the inside of the leather.
You will wrap the thread around the first two parallel holes a couple times to create a secure start to the stitching.
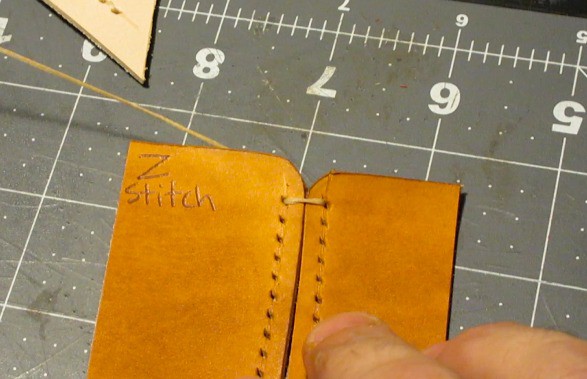
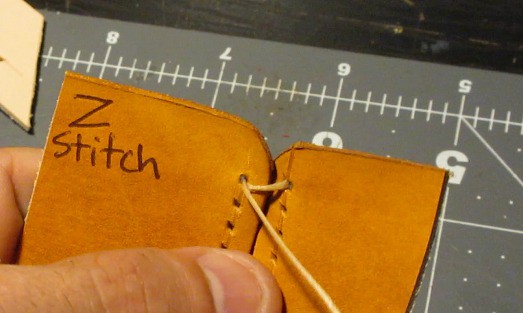
After the stitch is on the desired side you want the stitch to cross down on (I am doing a backwards Z). You will cross over to the hole that is below the hole you are on the other side of the leather.
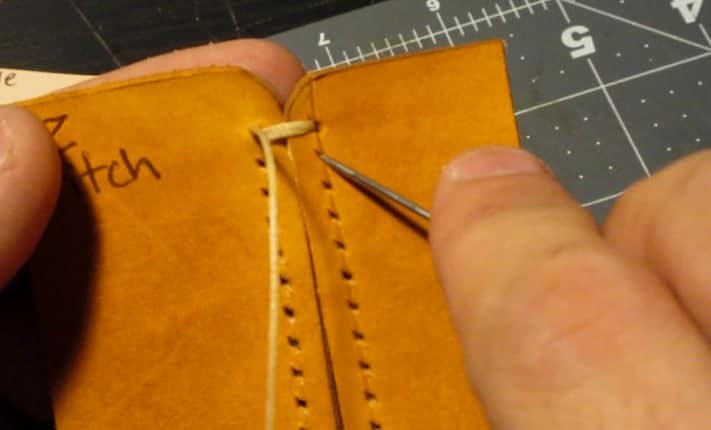
This should create a slash that goes over the edge of your craft. Once through, you will take the needle and go through the parallel line inside (underneath) the leather.
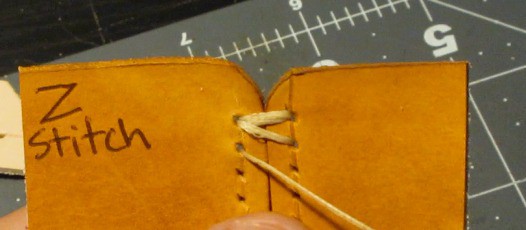
Wrap it through and back to this same side one more time. This will create the top and bottom of the ‘Z’.
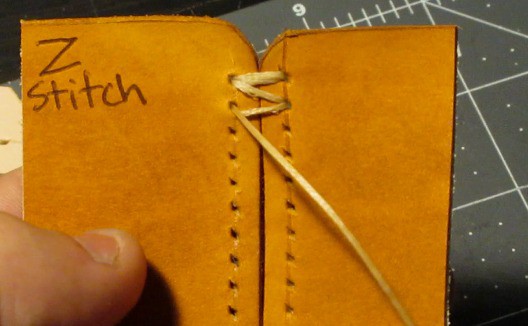
Repeat these steps until you get to the bottom and finish it off how you like.
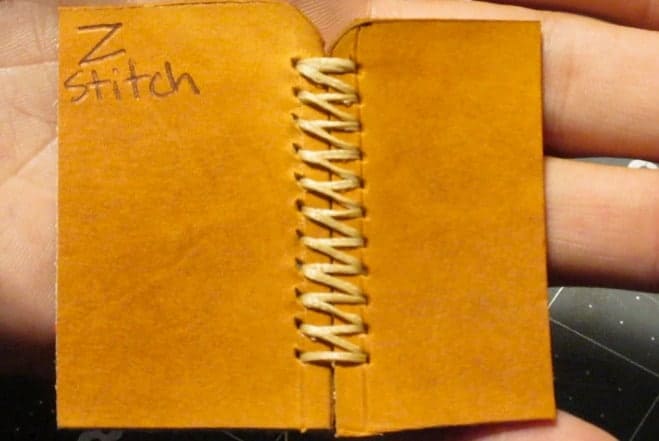
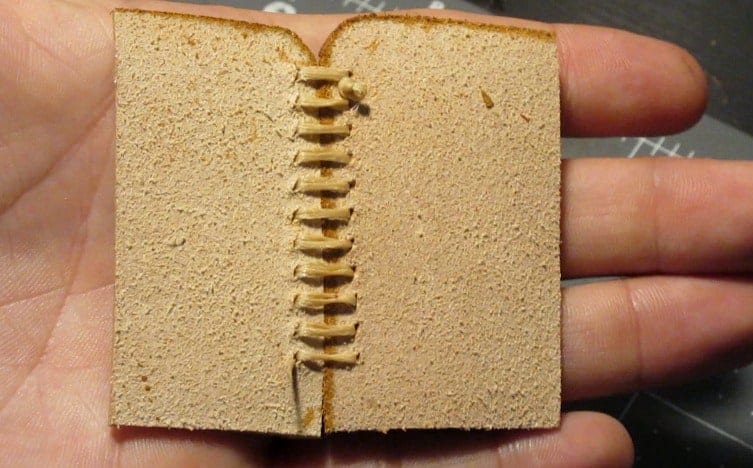
Those were the single stitching methods; now let’s go over some double needle stitching methods.
#3 Butt Stitch
This stitch is very useful for stitching two pieces of leather together that are next to each other. This is a very popular technique when wrapping leather around an object like a flask or steering wheel while keeping minimum thread on top.
To start this you want to have your two needles threaded and locked into place. Your leather should have holes that are pretty parallel to the other side/piece of leather already punched. Next you will take an awl and go through the top and push the awl through the side of the leather.
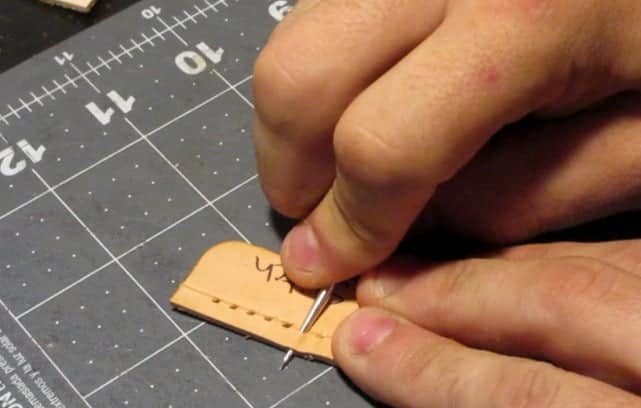
Make sure to do this on all holes on one side of the leather. It can also be very hard not breaking the top layer, especially with thin leather. To avoid this try to aim more to the bottom instead of the side. If the hole goes through the bottom it is much better than breaking the leather on top.
You will see what happens in a couple pictures when you split the top layer.
Once this is complete you should have holes that the needle can go through and out the edge of the leather.
Now you can start with treading one of the needles through the top, out the side. Then you will go the bottom hole of the other (left side) leather.

Might sound confusing at first but is very simple when you start to do it.
You’ll have one needle on each side and no thread showing on top of the leather.
Next you will take the needles on the side with the side holes and go through the hole that is below it. So right needle will go down one hole and through to the left side.
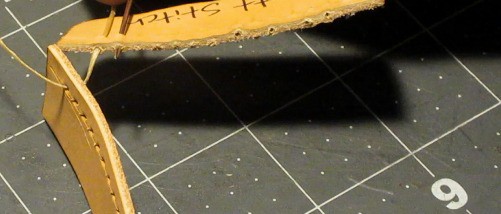
Then take the left needle that is coming out of the first hole and go through the second hole below it. This one you will go straight down through the hole then through the right piece side hole.
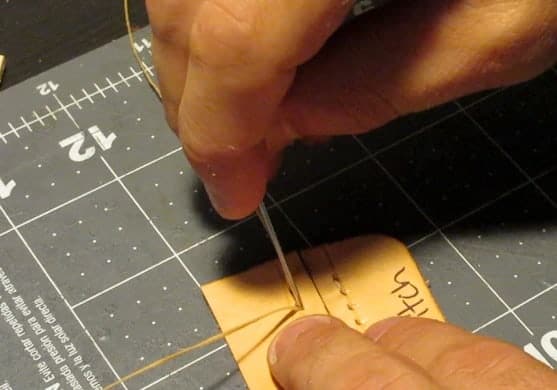
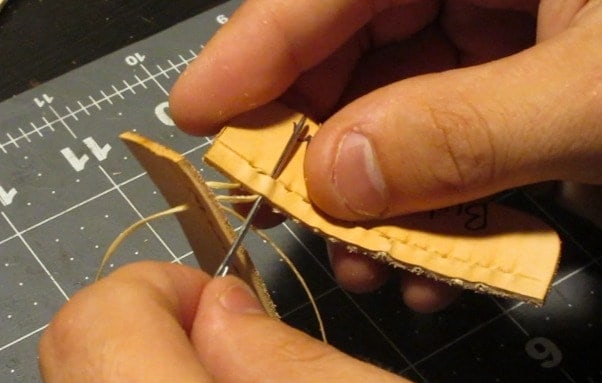
This will make it look as if there were two stitches running straight down both pieces of leather. But they will instead be attached to each other through the bottom.
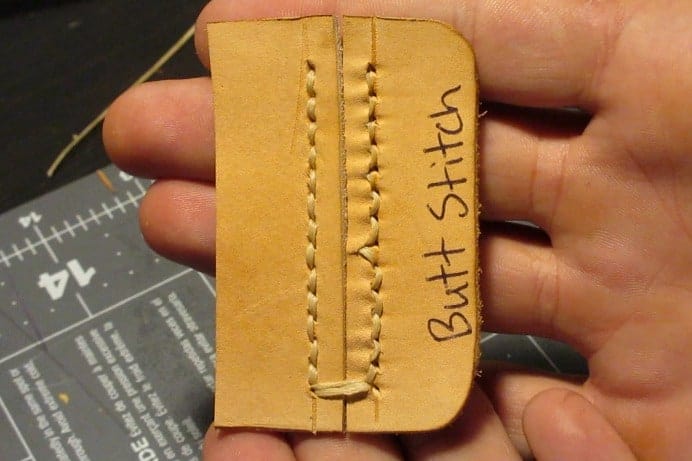
Once you get to the end you can go through the side holes and out the bottom of the whole to finish/burn the rest of your thread. I chose to end it with a tighter finnish by running the needles through the top parallel lines.
It is a good idea to tape or use some sort of adhesive when doing this to help keep the pieces of leather in place.
#4 Box Stitch
If you are comfortable with the saddle stitch then the box stitch is basically the same thing. The only difference when doing the box stitch is that your object is in a box like shape. This will cause you to do the same back and forth of a saddle stitch but at an angle.
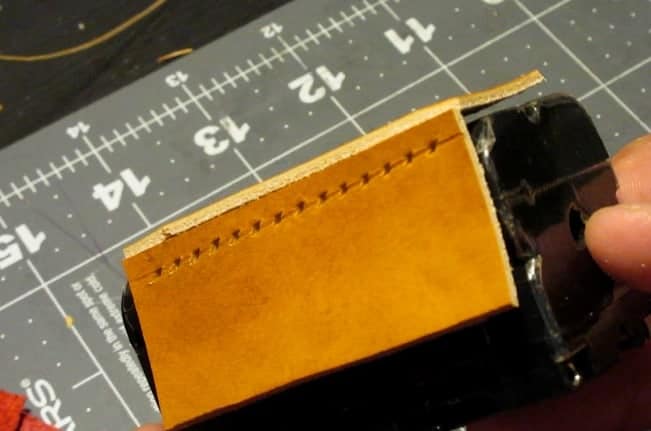
Place the needle through the front and bottom of the two pieces of leather. and then begin going down a hole back and forth till you reach the end.
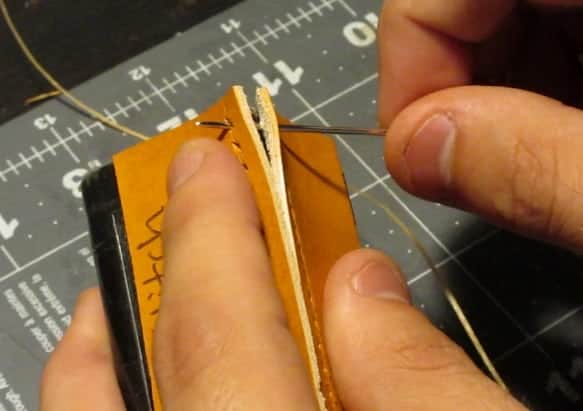
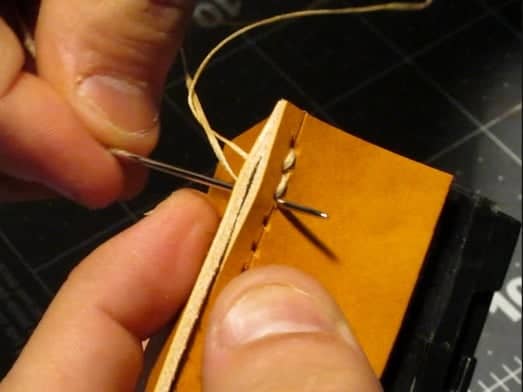
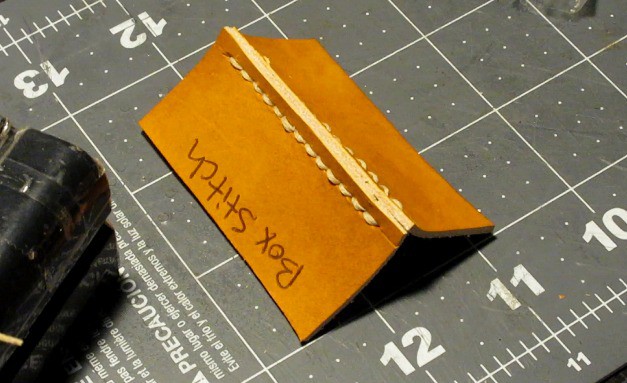
This will easily secure a two pieces of leather that wrap around an item.
#5 Cross Stitch
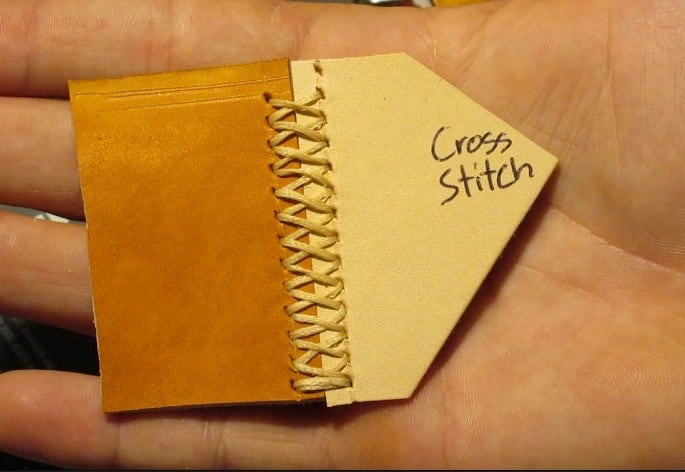
The cross stitch is similar to the single Z stitch but instead you will be making an X across the leather.
Punch holes parallel to each other where the crossing will take place, this can be around a boxed corner or 2 flat pieces together. You will start by taking one needle of thread through to have an equal amount of thread on each side.
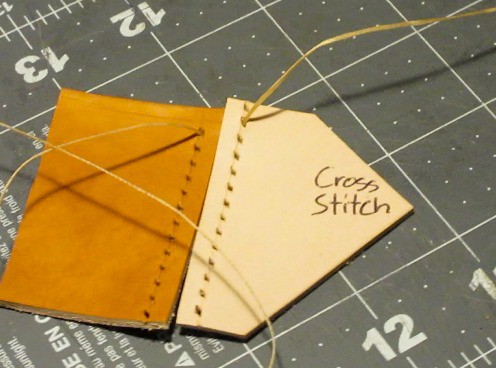
You can start by going parallel to make a line across the top for a more secure threading. But I will just start by making the “X”.
Cross one side over and diagonal to the second hole and pull through.
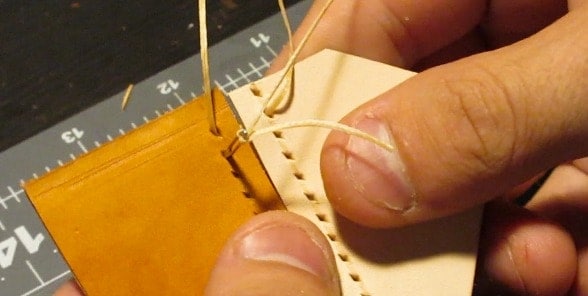
Then do the same with the other side going in the opposite direction.
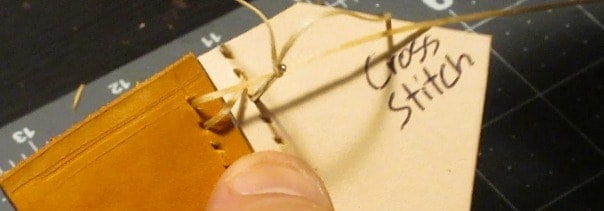
From the backside you will cross the threads through the parallel hole it is next to.
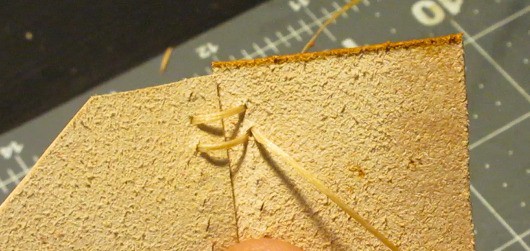
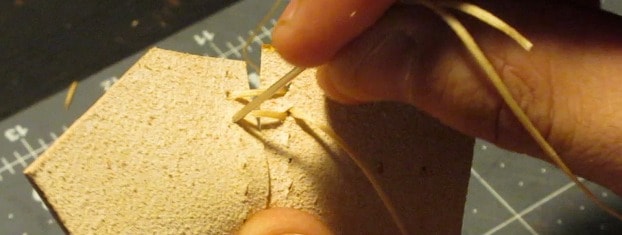
Make sure to start the cross on the same side every time to make a uniform look. You will continue this all the way till the end and either cross parallel lines or tie off the last X from the backside. This will not be as strong as crossing the thread over a few times but will look a little better.
You can also go back in the “x” pattern then tie the thread from the back that way.
#6 French seam stitch
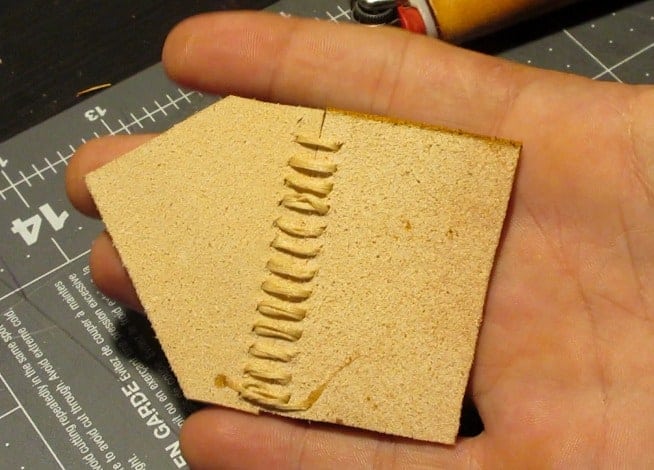
This stitch is very similar to the “Butt Stitch” but instead actually has the two lines of stitching going up and down the leather. This is common in car seats and can help strengthen the connection between the two pieces of leather.
In order to do this type of stitch it will be very hard for thicker leather since you will have to start inside out and flip the leather back over. If your leather is too thick then using the Butt Stitch will work fine since it will be dense between the thread.
You will start with the smooth side facing each other and punch holes through the two pieces. You will want to punch holes so you can fold the leather over enough to place a securing strip against it.

Make sure you have enough leather to overhang about an inch, this will allow you to secure your stitch.
Once the holes have been punched you can go ahead and do a saddle or single needle stitch the whole way.
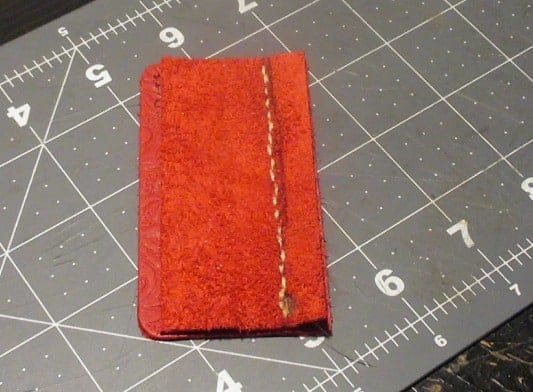
Next you will spread the leather apart so you are in between both of the layers. You can now attach a piece of leather, suede, fabric with glue or adhesive into the middle of these layers.

Kel-Toy Polyester Grosgrain Ribbon | Amazon
Buy at Amazon
Grosgrain ribbon is the perfect craft and gift wrapping ribbon due to its high strength and lovely appearance. Use it to wrap presents, make hair bows, scrapbook, embellish hats and in crafts.
We earn a commission if you make a purchase, at no additional cost to you.
This would be good place to put a suede piece of lining also for extra protection if you were creating a bag. Once this is secured in the middle of these two pieces you will want to groove and punch holes for each side.
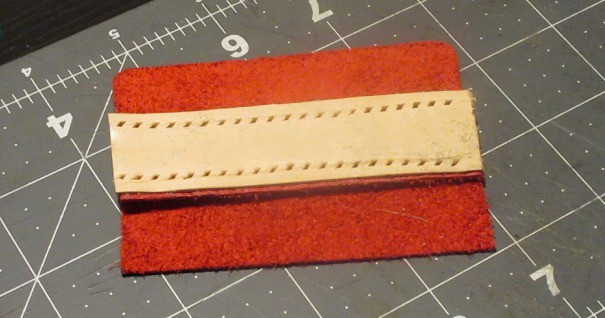
Make sure you punch the holes through the reinforcement and the leather. You can punch them through the top of the leather also if that creates a better look for the stitch.
Now you will be able to flip the leather over and saddle or single stitch these two lines. If you need to groove out the line for your chisel you can use the center of the two pieces to help you stay straight.
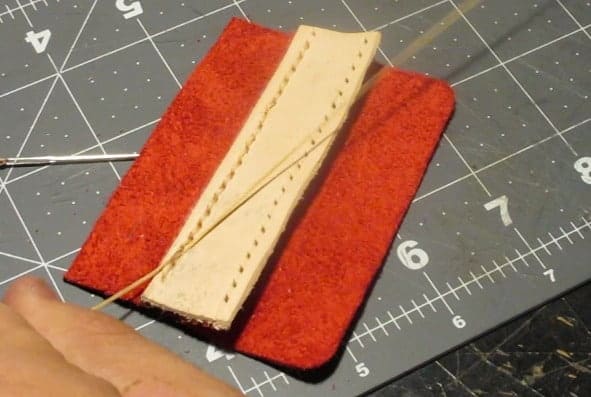
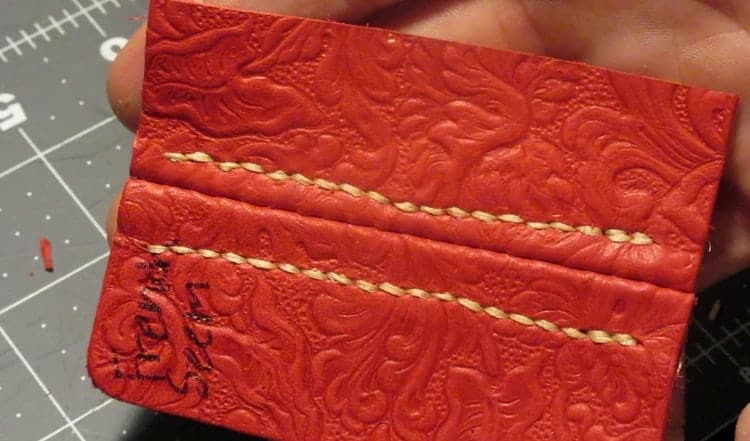
This will be a stronger bond for the two pieces, especially for thin leather that cannot be split through the middle.
This is more common for sewing machines as you have to sew three different lines. But can come in handy if you cannot do a butt stitch or want to add protection.
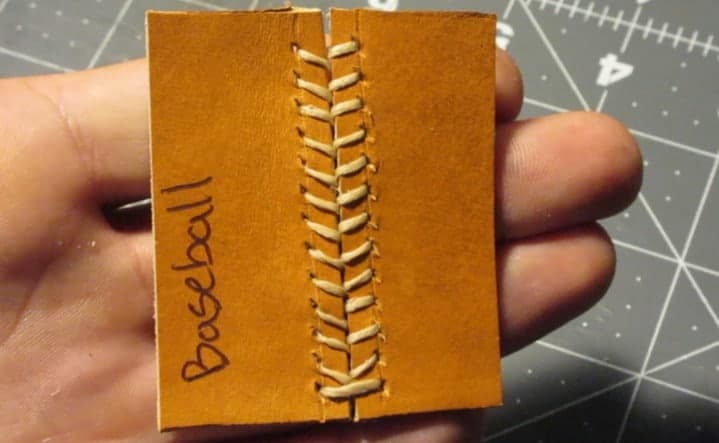
#7 American / Baseball Stitch
This received its name due to the stitching used on baseballs, creating a nice “V”shape the entire length.
In order to start this you will have two pieces of leather next to each other with parallel lines running down them.
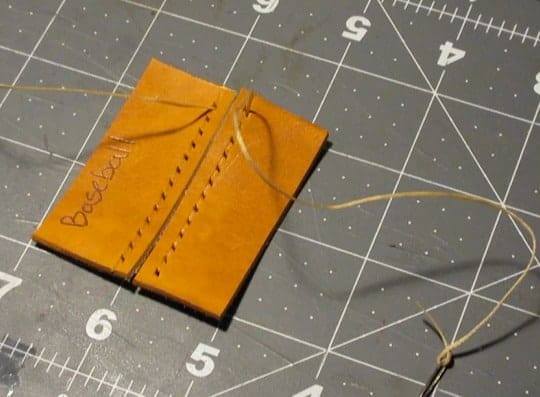
Line up your needles from the back so you have an even amount of leather and you can begin. If you want to make the top secure, you can cross over the leather parallel to create a line across for strength.
Now you are ready to start the stitch and you will begin with one side, we’ll say the right hand. The right needle will stay above the right piece of leather then go under and through the left side second hole.
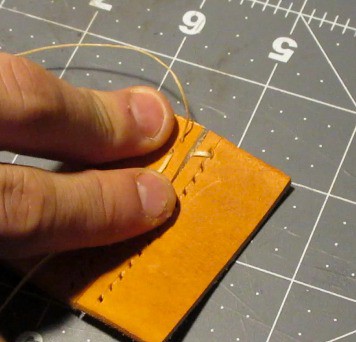
This will create one diagonal line that ends in the center of the two pieces. Next you take the left starter needle and go over the left piece leather and under then out the second hole of the right leather piece.
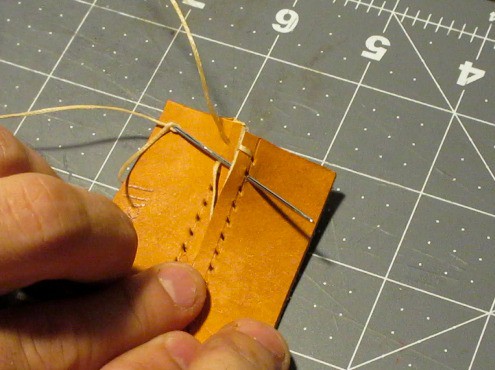
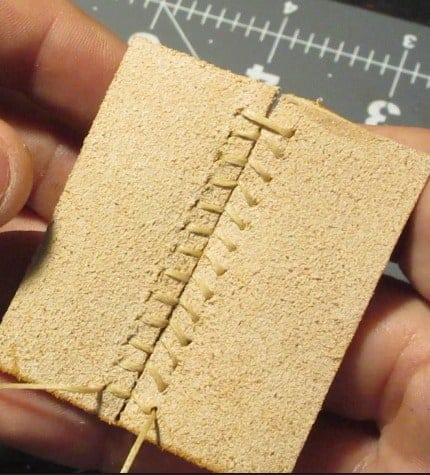
Now you should have what looks like a V shape and you can continue this till you get to the end of your lines. Make sure to continue going from right to left or vice versa every time to create a uniform look. You also will not have to cross the needles from the back since they always go out the front of the leather.
Once you are at the end you can cross the needles parallel to each other and cut and burn them underneath the pieces of leather.
All of these can greatly take your leather crafting skill to the next level. Since you cannot just saddle stitch your way through every type of project it is good to know for when you need to go around a right angle or create a more visually appealing stitch.
Shop Leather, Patters, Supplies & More | Leather Craft Pattern
Check Prices
Free Leathercraft patterns, leather patterns and tutorials, leather bag patterns, leather wallet patterns, and more for your crafting needs.
We earn a commission if you make a purchase, at no additional cost to you.
So make sure you try out these seven different ways to stitch leather to get more comfortable with them. Take some scrap pieces and just punch a few holes like I showed for examples. This is way better than trying to figure it out while working on a project as it can end up looking a bit messy.
Let us know what your favorite stitching method is to use and ones we should check out!


