How to Line Leather Items

Lining leather items can be used in many different forms and it depends greatly on what you are looking to accomplish.
Do you want to add some thickness, or is it just for aesthetics? No matter your reasoning to line leather, the method is basically the same on how to line leather. We will go over tips of lining and why you will want to line leather items.
How to line leather
When using a liner in your item, whether a belt, wallet or bag, you will want to have the leather already cut out.
Note that using leather with high oil makes adding a liner very hard even impossible as the moisture will not allow the fabric to stick. If you plan to focus solely stitch the fabric than you won’t have much of a problem except this will create loose spots on the liner.
Once the leather is shaped, trace this onto the underside of the fabric you will be using to line the leather. Avoid cutting around the traced line, instead cut out the liner so you have extra overhang.

Then apply some type of glue such as contact cement, leather cement or 3M high strength spray. This spay is very sticky and will probably cause a bit of a mess so you might want to avoid. Unless the piece of leather will be tucked away or the edges still need sanding.

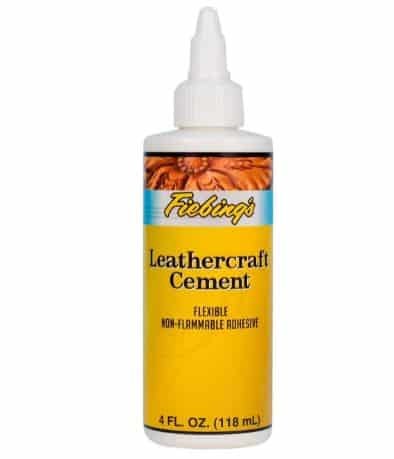
I am using Fiebings Leathercraft Cement which starts to dry very fast so moving fast is ideal. It will dry with a small dark colored stain that can be rubbed away even through thin fabric.
When applying cement to very big pieces, you can try using a paint roller to roll out the glue instead of brushing with a small area.
Once you have applied your glue all over the back (split side) of the leather you will also apply it to the fabric you are using to line. Apply this glue pass the marked line you have traced to make sure all of the edge surface will be covered in glue. Allow these two pieces to sit for a couple minutes until the cement/glue gets a little tacky, this will ensure a strong bond.
Press these two pieces together and use a roller to remove any air bubbles in the middle of the fabrics.
Next place some sort of weight on top to allow them to evenly glue together. After the glue has set for 5-10 minutes, take weight off and cut away the excess lining around your leather.


This should leave you with a nice equal edge to burnish later. This is when/if, you will want to, stitch these pieces together. Perform the steps of an average saddle stitch by grooving, punching holes and sewing.
You can wait if you are stitching this item to a bigger piece, as if glued correctly you will have no problems waiting to stitch.
Bag Stiffeners
Springfield Leather Company Bontex Bag Stiffener | Amazon
Buy at Amazon.com
Perfect for adding support to your bags, book covers and more. Comes approximately 48" x 44" per sheet.
We earn a commission if you make a purchase, at no additional cost to you.
When adding a bag stiffener to a piece of leather, this will, as the name says, stiffen the surface you are using this with. These can be used around the sides of bags/purses and inside wallets to ensure a longer strong life out of your leather item.
These bag stiffeners can be cut into pieces to fit smaller areas. They are not needed for many items, but if you want to strengthen the leather, these might help.
For stiffeners you will perform the same process as above but will most likely have to cover the stiffener. So this process will be performed twice, once with the bag stiffener and outside leather, then leather or fabric on the inside to cover the stiffener.
You will want to do this to avoid having the bag stiffener showing on the inside of your item.
Most of the time inside bags you will either see a loose piece of fabric or a stitched against piece that will be covering this stiffener. Which ever way you decide is based on personal preference of the item you are creating.
Reasons to Use Liners
Liners will mainly be used to either build up the structure of your leather or will just add an extra creative style. Adding two pieces of leather or leather and suede can double the thickness of your piece of leather.

For instance I have a back piece of a wallet that is too thin so I will apply another piece ontop to create a 4-5 oz piece instead of a two ounce.
This will improve the back structure of this wallet and avoid having it be a little too thin. This not only adds a nice look to the inside of the wallet but adds strength to thin two ounce leather.
Suede can also be used for structure as suede is pretty thick but flimsy. Yet when sewn and glued to a piece of leather it can easily take on the structure.
When apply liners for creative purposes, there are infinite possibilities.
From Inlaying suede behind cut out leather, to applying thin fabric to cover up the fuzzy bottom of a piece of leather. Create your own designs and cut out pieces to let a more vibrant color come through. I always found it cool when a piece of leather has a dark brown but inside you see a blue or red piece of suede, making the item look a little classier.
If you trust in your glue you can use this to cover up stitching on your leather.
This is very common on many shoes as they will place a piece of leather, linen, cotton or another piece of fabric to cover stitching on the bottom of the shoe. With shoes it is very easy as they lay flat on the ground and take on the shape of the foot so they stick better to the shoe.
But this method can be used anywhere else to hide the guts of leather and stitching to create a better look.
Learning how to line leather will greatly improve your leathercrafts and take your items to another level.


