
How to Make a Leather Template
Making a leather template can be very intimidating. But before you go along ripping wallets apart measuring the sizes to recreate. We are going to go over how to make a leather template then computerize it to a downloadable pdf file. This way you can save it if you ever lose it or even sell it online.
This is very common for leather crafters to make some extra money from designs they already use.
How to make a leather template
First you will want to decide what type of leather item you are going to make. Whether you are making a wallet, bag, purse or suitcase you will need to have a rough idea of how the item will look.
For this example we are going to go over a wallet design and speak briefly on some other items.
Wallets to me are much more difficult than they seem when it comes to measurements. Since wallets will have multiple pockets that need to fit in a small space it is very important to get measurements right. And if you can make and understand a wallet template, it will make it much easier to understand other leather items.
I am making a bi-fold wallet with four card holders and a cash pocket. Once I have decided on the image of the wallet I will begin measuring it out.
Start with measurements
A dollar bill is a little over 6 1/8” wide by 2 ½” tall. So we know a wallet when open must be bigger than the cash size.
An average credit card is 2 1/8” tall by 3 3/8” wide so if we want to have two sides holding cards the open wallet will need to be over 6 ¾” wide.

But we will need a center fold area and room for the stitching so this is where we need to start adding some fractions.
To start we are going to take our leather size we will be working with. For this we will say an average size of a 4oz piece which will equal 1/16” thick. And the thickness of a credit card which is around 1/32” thick. But for extra ease for the pockets we will use the 1/16″ thickness.
If we want to have multiple cards inside each pocket we will add 1/16” around the whole area of our pocket. So with a credit card slot that holds one extra card you will add 1/16” around the credit card size.
You will apply this to every side of the pocket except the opening of the pocket. This will add extra room for the card slot to open allowing for the cards to sit in.

But it doesn’t end there, now you will add extra space around the leather for stitching.
I tend to try to keep my stitching 1/8th of an inch from the edge of the pocket. So I will add an extra 1/8” around the edges that will be stitched.

So using our example, a wallet card pocket holding four cards should be around 3 11/16” wide by 2 7/16”. It can get a little confusing when you have to even out the fractions, but well worth it to get an exact measurement.
For safety I will usually round up to the nearest simple fraction so I say 3 ¾” wide by 2 ½” tall. This adds a small amount of safety and if I need to I will put the stitching a little further than 1/8″.
When you are drawing this out constantly check the pocket, making sure the stitching lines will not be hit with the cards.

Now repeat this for any other area or just copy and paste it wherever you want the card pocket to sit.
For a foldable wallet you will want to have a middle fold area. To close smoothly without bulging out the leather you will also want to have the back piece of leather longer than the front piece.
These are sort of personal preference depending on how wide you want the wallet to open at. A much larger back piece will have the cash pocket mouth open very wide but the wallet itself will not open as much.
I usually stick around a ¼” to ½” difference. The best way to test this is to take two pieces of leather and binder clip one side then fold it like a wallet and mark where they meet. You will see that the back piece has a different length than the front piece.

I do this with a failed attempt of making my own template months ago as I tried to make them the same size. It sadly folded in the middle and I realized I needed space for it to work properly. Do the same thing with some scrap pieces of leather and see where the difference is.
For the fold area I will go from 1/2” to ¾” of an inch wide to allow for space for both sides of the wallet. This is also personal preference that you will want to play with. If the wallet has many pockets for a bunch of cards you will want to widen the centerfold.
The process of making a leather template
I start out by tracing a rectangle as a reference point on a piece of tracing paper. After I have this rectangle will apply a credit card where I see fits then start adding the extra measurements around the card.
I square this measurement up using the cutting mat for guidelines.

I place the card on a straight edge then run lines up with the ruler. This is because I will use these lines for a card holder right above the first one. I add 1/8″ for the stitching and another 1/8″ for space for multiple cards.

Once I have the first pocket finished I will make a second or third one using the same measurements. I will usually alter the shape a bit since it will be behind the first pocket.


Once the second pocket is planed out I will add the center line. For this one I added ¼” from the pockets and fold the paper in half.

Now I can trace the other side of the wallet onto my paper. Once traced I will now see how long the inside leather with the pockets will be. This one is 8 ¼” long by 3” tall with just the pockets. I will add an extra ¼” on top of the top pocket line, this will make the wallet 3 ¼” tall in total.

Write the sizes for every item onto the paper so it makes it easier when making a computer edit.
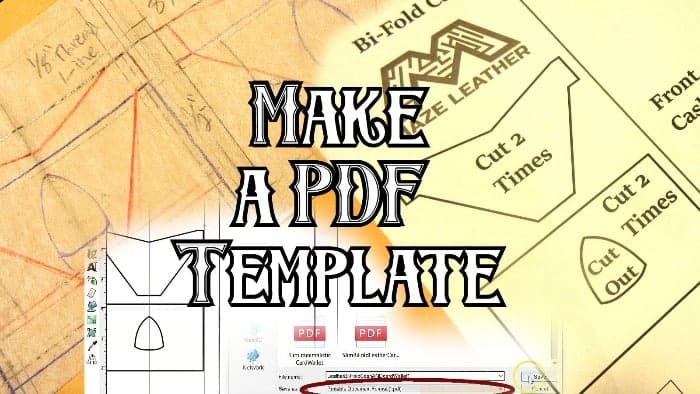
How to computerize your Leather template
Now that your drawing is complete, you can scan it into your computer. If you do not have a scanner, a local library or Staples will have one you can use. Or you can take a picture of it but it will not be as accurate.
Once onto your computer you will need some type of vectoring program. Adobe Illustrator is a very professional and common program but does costs a monthly/yearly fee. The one that I am using is called Inkscape and can be downloaded for free.
The process is pretty much the same regardless of the program you use, but some buttons may be different.
Open Inkscape and import your scan into the document.

To make it easier we will set the document properties to an 8.5” x 11” page and change the guides to inches.


This will make it much easier to use your measurements written down. Plus it will help you see how your template will look when you print the page off a regular printer.
Setup your scan into the page area of the document so you can easily see.
Next I will start working on the pockets. I will grab guide lines from the top and side of the page to mark out the first pocket. To do this you will click and drag on the guide ruler area. Place them around your pocket.


Click the line tool and make your lines on top of the guide marks.

To set a straight line click the left mouse button then hold the CTRL button. This will let you draw the line across in straight direction.
When you get to the corner of a square click the left mouse again to set the line. Then go around your corner and draw through the next line. Once you have made it to the end click onto the first node you started.

This will make the line appear. Now you can change the size of the line using the stroke style tab. I usually keep everything the same but use a 0.5 – 1 mm stroke width.

This is a little extra fat when cutting but I’d rather it be a little extra bold instead of skinny.
For the thumb hole in the first pocket I will start at the top, bring the line straight down to the corner. Then add the last line in the center and hit enter. This will make a very straight line that doesn’t look how I want it to but will give me the line.

Now I can click the line edit tool and shape them until the line matches or is close to what I want.


Click this line with the select tool and right click, copy, then paste.

Use the flip horizontal tool and connect it to the original line you made.


Drag the line you just flipped to the original line. They will snap to each other from the nodes you made.
Highlight both of them by holding SHIFT and click on both lines. Go up to PATH and hit UNION. This will join them together. If they do not join together, undo the UNION and hit OBJECT then GROUP the items together.

Highlight both the thumb hole and the square pocket and hit OBJECT then GROUP. This will make the square pocket and thumb hole on object to easily move around.

I will do this process for both pockets one time. So I will move my scan and then trace the second pocket that is above the square one the same way.

You do not need to duplicate these pockets since they are the same on both side. I will usually add a “x2” or “Cut out twice” on each one of these pockets.

Now that the hard part is over, all you have to do for the cash pocket is use the square tool and trace with guides.

Use the ruler guide to make sure it is setup to the proper height and width. In order to print out you will need to place this rectangle up right.

Then add another identical rectangle with an extra 1/2” or however longer you want the back of the pocket to be.
Now you have successfully transferred your drawing to a printable picture. Now you can delete the picture then add some text to your image.

Now for inkscape they don’t have anyway to save a PDF to print out two pages. So start with the first page adding some extras and a title. Square this up in the document page.
Go to FILE, SAVE AS, and name the template (as #1) then click the dropdown and choose PDF file.

Now your first page will be saved to a PDF. Move the first Page items out of the document and place the rest of the items into the document.

Now that the back template is in the document page you will save it the same way as before. Name this one the same thing but number 2.
Once you have both of the PDF files you will open PDFmerge. Place the first one into the top spot and the second one into the second spot.

Then hit merge files and wait until the download button appears. Download this PDF. Now you can move it to a file or your desktop and rename it. Open it up and now you will see that it is combined. Allowing you to print this on two pages.

Now you can easily share and print out this template!

You can check out this finished bi-fold card and cash wallet template. I did have to change it a bit but not much at all.
If you are interested in making this wallet you can check out our how to make a leather wallet guide. In this guide we use the template I made in this article.
Making other leather templates
Since using the wallet example probably gave you a good idea of how to measure your items, it should be a little easier to create bigger items. A good tip for making bags, purses and suitcases would be to use your design and make a paper example.
This will greatly help you fix any kinks in your project before starting to draw it out on a computer. Test how the item will look and feel to examine any oddly shaped items. I am not going to go into major detail about how to make a leather template for these items.
Another great way to make a leather project is to use an item as your guide.
When making a knife sheath you can easily trace the outline of the knife then start adding an extra width to each side. This is pretty universal when you are making items that go into your leather such as scabbard or gun holsters.
A simple way would be to use the leather completely as your drafting method. This will allow you to wrap the leather around you item, mark off where the joint ends and start working right away.

If you want to make this into a PDF file, you still can. All you will need to do is write down your measurements as you are crafting the project.
When you cut the leather, trace it onto a piece of paper where you will be able to scan it into the computer.


Then apply the same steps as we talked about early for vectoring your image.
Finished
Hoped this helped you get a better idea of how to make a leather template and transfer it to pdf. This is very cool skill to have especially when getting into leather crafting and starting to make your own designs.
If you own your leather business it is a great way to easily sell some of your own templates as well. Try this out next time you start making your own leather template.
Like I mentioned before, you don’t want to be tearing apart leather wallets trying to find the right sizes. But it is also not a bad way to use as an example. I did this with some old wallets I had laying around and started measuring them to find out how wide and tall each pocket was. It’s not a bad idea, especially if you can find them at thrift stores for a couple bucks. So doing this might help you better understand how to make a leather template also.
To transfer this template to a more durable material check out how to make a cutting template! This will be a much cheaper method than buying a custom acrylic template.
And if you ever get stuck using inkscape or Illustrator, there are a bunch of blogs and YouTube channels dedicated to these software’s.