
How to make a leather wallet
Making your own wallet can be very rewarding. There are many different kinds of leather wallets, but today we will be making a bifold wallet. You can get this free card and cash wallet template and follow along. We will go over the steps and tips on how to make a leather wallet.
Going over what we need
For this wallet I will be using all 3/4 oz veg-tanned leather (which is a bit thick for a wallet like this) and using a custom template to follow. This template is from our guide on how to make a leather template from sketch to PDF file. You can download the bi-fold card and cash wallet template here to follow along.
When making a wallet with multiple card slots, it is good to have some 2/3oz leather. This way the cards will have room to stretch out the leather and you can avoid having a bulky wallet.
Before you can start making a wallet you will need some leatherworking tools. For this you can check out our guide on what you need to start leatherworking or our resource page. These pages will go over basic and tools and some extras you will need to create most items with leather.
They also include good sites/stores to purchase leather from. Tandy leather has some local shops you can look up and if worse comes to worse you can check out Hobby Lobby. They don’t have the best leather but they should have a 4oz “premium veg-tanned” roll about 5-7sq.ft.
This will last you quit some time and they always have sales and coupons.
For tools, if you didn’t check out the pages above you will need: leather, thread, needles, razor blades, rulers, stitching chisel, groover or wing divider. I will have links to all the items I used in this page and they are mostly on the cheaper side.
How to make a leather wallet
Step 1. Making the leather pieces
We have a list full of paid and free wallet templates to start off your next project. All of these templates have been tested and revamped to fit our standards to ensure no issues while using these templates. To download this free template you can click the Bi-fold leather wallet template and print that out at 100% size.

This will give us a basis to work with to create a wallet that will fit cash and two pockets for credit cards.
Print your template out at 100% scale to ensure the measurements are not off. You can use the “1in. Test” box to make sure the template is sized accurately. Cut each pattern out using the outside of the line and a ruler to square off your cuts.
Once all of the pieces are cut out you can transfer them onto your leather. Trace around the template with an awl or a pencil on top of the leather.

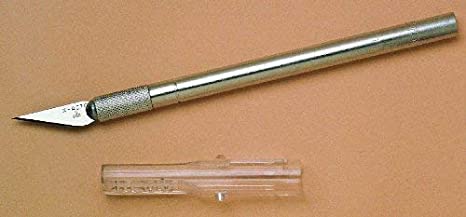
Begin cutting with an X-Acto knife or rotary cutter and take your time making sure you get a solid cut. When cutting leather you want to apply enough pressure to avoid having to cut over the same area multiple times.
Use a ruler to help cut along long straight edges. Preferably using a metal ruler will be the best as your blade will not slice into the ruler like it would with a plastic one.
Once all of the pieces are cut out you will want to sand the edges down. This will help smooth them out and help fix up any errors you may made along the way.

I use a 220 grit sandpaper as it is recommended to use a fine grit sandpaper around 150 and up. This way you avoid taking out deep chunks of your leather.
For sanding straight edges you can hold two pieces together and run them over top a piece of sandpaper laying flat. Sanding will also help round off corners of your project. As many of my templates do have rounded corners and cutting around them can be tricky, sandpaper can be a big help.
Once all of your pieces are sanded down, remove any leather sticking up from the edge. This is done by using an edge beveler to cut away the very edge of your leather.

The beveller linked above is a size 2 beveller which may be a little big for smaller projects.
If you do not have an edge beveler you can use your sandpaper and rub the leather at an angle.
Step. 2 Dyeing the leather
If you have not dyed the leather yet, now is the time before you start stitching. You can check out our dyeing guide to check out two different ways to dye and a more in depth version.
To start you will want to rub away and leather from sanding and beveling away and off the leather. You will also want to clean the leather with some watered down rubbing alcohol or a deglazer. This will help to remove any dirt, oils and finishers on the leather to help evenly dye the leather.

Next you will want to protect your table and wear some gloves to avoid staining clothes or hands.
Rub the dye throughout the surface of the leather in a circular motion for around three coats. You can rub in more or less coats depending on how dark you want the leather to look.


I am using a cotton ball but a wool dauber is the best for dyeing leather. Alternatively you can use a sponge as well, this will help soak up a lot of dye. While easily releasing it into the leather from adding pressure.

You will want this to dry for around fifteen-twenty minutes or until dry to touch. After the leather is dry you can add some finishers and protective coats onto your pieces. These will help prolong the life of your leather and your product. Some of these finishers are considered acrylic resolene or saddle soap.
These will either come in a liquid or wax state. You will rub these into your leather and let dry before starting to glue on pockets.
Resolene, sheen and saddle soap will take much less time to dry off and should be ready to stitch in a couple minutes.
Step 3. Finnish card pockets
Before glueing you can skive around the edges to create a more flush pocket. For best results you should use a skiving tool. It is usually a very sharp razor that will evenly cut away the leather where you will stitch.
This will give extra room for your pockets and allow for the edges to lay thinner against each other.

Once you skive the edges of the leather where you will be stitching, start burnishing the card pocket edges.
To do this you will start by wetting the edge a small amount and rubbing over the edge with your finger. Then apply some Tokonole to the edge and rub this in with your finger.

Tokonole will help smooth out the edge and help create a rounded surface along the edge. A similar substance is called gum tragacanth, but it does not work as well as the Tokonole in my opinion.

Once you rub this in a bit with your finger you will use an edge slicker to really slick the edge. This will create a very rounded and glossy look to your edge. I am using the dremel edge slicker attachments but using a handheld one works just as good.

You will want to do this before attaching the pockets to the cash pocket because it will be very hard to do once attached.
Step 4. Attach card pockets
Start adding pockets to the “front piece of cash pocket” leather cutout. I use Fiebings leathercraft cement but using average contact cement will work well too.
Use the bottom card pocket to line up the top card pocket and mark this off with your awl.

You will do this for both sides of the wallet for the top card pocket.
Once the pocket is marked you will want to scratch away the leather where you place your cement. This will help strengthen the bond between the leathers.

Lay some glue down and spread out to a thin layer around 1/8” – 1/4” of cement and place your piece of leather on top. Apply some binder clips where you can or place a weight on top to secure the piece.
Keep it in place and let sit for five to ten minutes or until dry.
Once you have the top pocket pieces glued on each side you will want to stitch the bottom of the pocket. We have a full guide that goes in depth on how to saddle stitch (common way to hand sew leather). This goes over how to setup your needles and how to sew the thread. But we will briefly explain.
You will start by using a stitching groover or wing divider and mark the line for the stitching.

Next use a stitching chisel punch and a mallet to punch out your stitching holes in the leather.


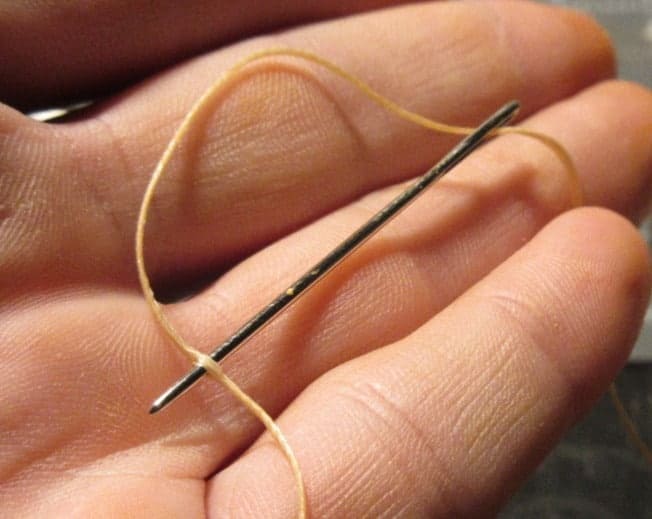
Once the holes are punched you will start to saddle stitch the holes. To begin you will take two needles and some thread. On each side you will have to “hook” the needles onto and through the needles.
You will start by placing one end through the eye of the needle then pierce it onto the head of the needle.
Then you will pull up on the thread that is locked onto the needle until you are past the eye.
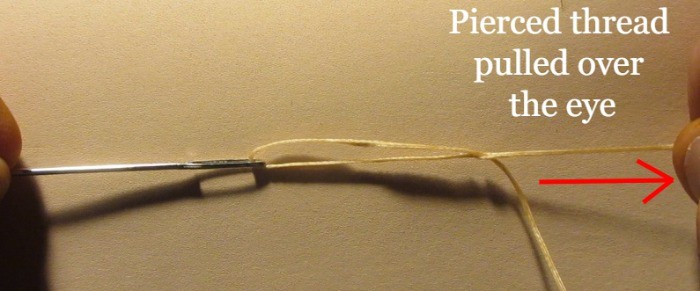
Then pull the thread that is not locked onto the thread away from the needle. This will make a hook around the the eye of the needle.

Now you will repeat this step on both sides of the thread. I am using Industrial Revolution waxed polyester thread. To know more about thread used for sewing leather you can check out our thread guide.

Once the needles are prepared you will slide one through the first hole and pull until the thread is even on the same side. Next take one of the needles and run through the second hole.
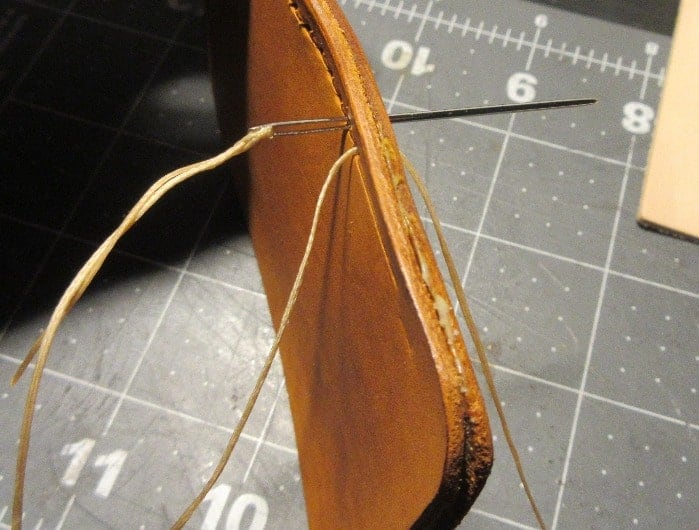
You will pull on this until it goes all the way through the stitching hole. Then take the needle that is coming out the first hole and send that through the second hole as well.
This will lead you to have one needle on each side of the leather coming through the second hole. You will then continue this back and forth process while pulling on the strings to tighten them as you get closer to the end.
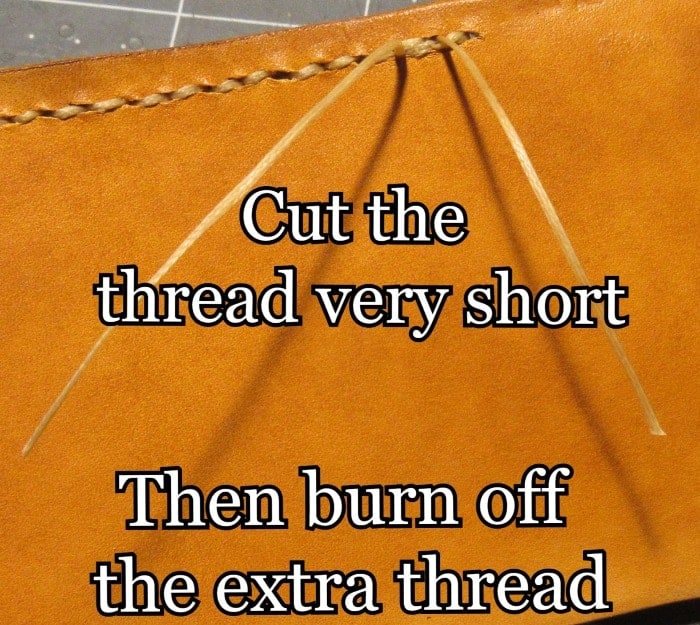
Once you reach the end, you will want to back stitch, cut and burn off the extra thread.
Once this has been done to both pockets it should look something like this.

Don’t worry about the edge areas being stitched, as we will get to that later on.
Now you can add the bottom card pockets. For this you will want to do the same process as above, but the stitching will be different.
So place the pocket on top of the bottom pocket and take note of where you will scratch the leather.

Now apply glue and use binder clips around the pocket to hold in place.

For the center area, place a weight that can hold down the leather pieces.
After the glue has dried you will want to stitch these pockets using the same saddle stitch method. But instead of stitching the bottom of the pocket, you will stitch the inside edge.

This stitching will go through the top pockets as well.

For this wallet I added a fabric liner for extra color. To do this you can check out our guide on how to add a liner and why you may want to.
This is completely optional but I like it because it hides the stitching from the inside of the leather.

Now that the pockets are in place you can start making the cash pocket.
Step 5. Attaching the cash pocket
Since the card pockets are secured to the front of the cash pocket, we can now attach the back side of the cash pocket (or outer shell of the wallet).
To start you will want to apply some glue in an “L” shape around the corner of one side of the pocket.

Press the front of the wallet against this glue and use the binder clips to keep in place.

You should notice on the other side a little extra overhang of the back leather piece. This is how you want the leather to be as it will help the wallet fold without wrinkling in the middle.
After the glue has dried you will take off the binder clips then proceed to stitch around the “L” you just glued.
To get a straight stitching groove line you may want to sand down the edge a bit. This will even out all the layers that are on top of each other.

Groove then use your chisel to punch out the holes around the edge. Avoid going past the the bottom card pocket as you will want this to not be stitched.

This will stitch up the last edges for the card pockets and secure your cash pocket.

Now repeat this on the other side of the wallet. Since the back leather is longer you will have to pull the card pockets to the outside piece of leather.
This will leave the middle area with a small gap in the middle and this is perfect.
Once the glue has dried, sand the edges, hole punch the stitching holes and sew this side of the wallet.
Now that your wallet is all stitched up, you will just need to add some finishing touches.
Step 6. Finishing wallet
Fold the wallet in half and start sanding around all the edges on a flat surface.

Rub the wallet back and forth until all the edges are even. When sanding away the edges of the wallet you will be removing the dye around the edges also. You can either leave this how it is or go back and dye around the edges.

Apply a couple coats of dye around the edge and then start burnishing the edges.
This is done the same way from burnishing the card pocket pieces. Rub the leather edge down and apply some Tokonole then rub it in a bit. Use your burnishers to slick up the edges and now the wallet is complete.


This process is pretty universal when crafting items out of leather.
Depending on who you talk to they might apply their finishers when they are done or punch holes before dying. It is all personal preference and takes time to find out what process works the best for you. But hopefully this helped out give a better idea of how to make a leather wallet.