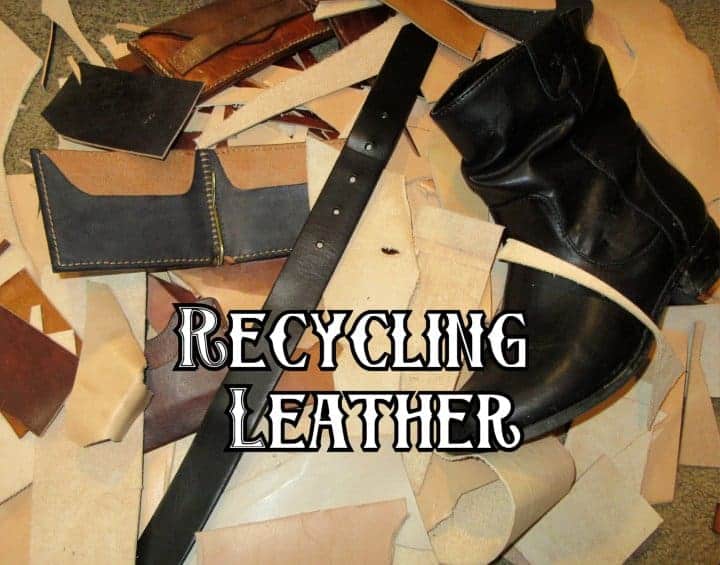
How to Make a Leather Belt in 10 Easy Steps
It is such a challenge to find a good leather belt nowadays, so knowing how to make a leather belt can set you apart. For precisely that reason, a leather belt was the first leatherworking project I ever completed.
It has served me well because knowing how to make a basic belt taught me all the skills I needed for ongoing projects like making a sheath with a belt attachment, making a leather headdress, and making a holster with a strap over the shoulder.
Why Learn How to Make a Leather Belt
In addition to being able to make a belt that actually fits you, is the color you like, and is durable enough to be worn while working on a ranch day in and day out, learning how to make a leather belt gives you expose your to all of the basic elements of leatherworking without requiring a lot of upgraded tools. From a belt you can upgrade to a wallet or a sheath.
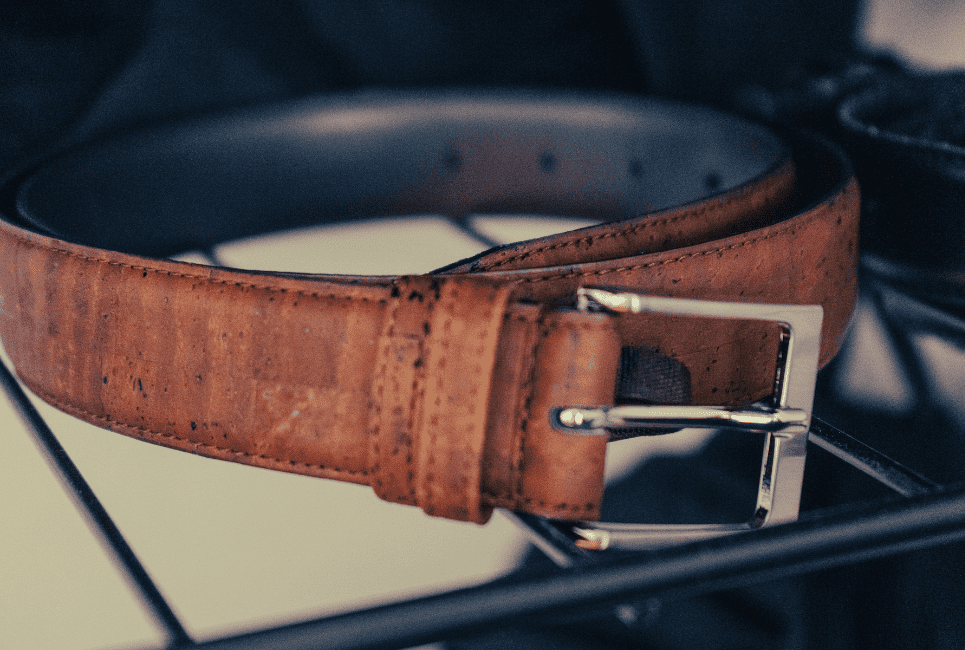
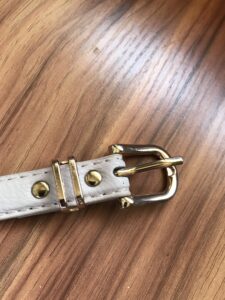
Here you can see a picture of the first belt I ever made. It’s been well over 10 years and it is still in great condition. In fact, I think I’ve finally broken it in.
It does have an upgraded Celtic belt buckle though.

Find Your Leather
I used ½-inch strips of 10-ounce leather for my first belt. I had a hard time finding a good piece of leather long enough to make a belt (without just ordering an entire cow), so I cheated and ordered a precut leather strip.
Spoiler: this saves you money on tools and wasted leather.
Tip: Grab a tape measure and measure around your waist or the waist of the person for whom you are making the leather belt. Add 10 inches to the waist size. So, if somebody has a 32-inch waist, the belt blank needs to be trimmed to 42 inches when it is complete. This gives you enough material to fold over your buckle and some material to extend beyond the buckle prong holes as your tailpiece.
- ELW has leather blank belts cut in varying lengths, so you can find a measurement that works for your size. These are vegetable-tanned leather belt blanks. Vegetable tanned leather strips are usually thicker and more rigid. They have that natural hide color. This is a classic leather for belts and strap making.
- You can be somewhat of a cheater and get full grain buffalo leather strips that are already colored with a rustic dark brown, so you don’t have to invest time and material dying it*.
- You can be an extreme cheater and get Tandy leather cowhide belt blanks with precut holes. This also saves you money on tools, but it deprives you of the complete experience of making a leather belt from scratch.
*If you are not dying your belt, you will not need the deglazer, leather dye, sealer, or wool daubers from the tools list.
Find Your Hardware
I used a solid brass 1½-inch roller buckle with two Chicago screws (get a male and female, or your belt won’t come together). You can find Tandy Nickel belt buckles too.

Collect Your Tools
When I start a new hobby, I’m always insecure about my lack of expertise. I want so desperately to buy a beginner kit that presumably has all the tools I will need so that I don’t have to figure out what six individual tools I might need right in the middle of my project.
I won’t tell you the brand name, but you can see in this picture that it looks like a great deal because of all the pieces it comes with.
But, the rivets I bought kept crumbling when I tried to piece everything together. If you so much as looked at them for too long, the thin material buckled.

I threw out at least a dozen broken pieces before pausing my project and buying higher-quality replacements (overpriced) from a nearby store (where the representatives were rude to me).
Tip: One of my biggest pet peeves with any hobby is the quality you get when buying a kit. It seems like a great financial decision to buy a beginner kit with all the pieces you need or all the basic hand tools for decorating your belt. But the tools are usually garbage, and all of the pieces are made from the thinnest metal possible. They WILL break almost immediately, and they WILL make your leather working project a huge pain.
So, don’t do it. Even if you are unsure whether you will continue to make any type of leather project in the future, invest in at least medium-quality tools and accessories from the beginning.
Plus, if you have decent-quality tools, you are much more likely to take on additional leatherworking projects because it reduces the ongoing cost of your hobby.
You will notice that my tools of choice and materials come from Tandy Leathercraft. The Tandy Leather Factory makes excellent quality materials, and they are the company I turn to for all of my leatherworking supplies now.
For my liquid products like resolene, oil, and dye, I use Fiebing’s.
Tools List

Cutter
If you want to buy a cow and cut the leather pieces to fit, you will need a hand-cutting tool, like the Jovitec Leather Cutter.
Edger
You will need an edger to shave off the edges of your leather. I have a Tandy Leather Factory edger.
With this tool, the edges come to a 90° angle. But when you are done, they should have a smooth, rounded corner.
Groover
A goover cuts grooved lines into your leather.

In this test piece picture, you can see a section of dyed leather belts with grooved lines along the perimeter. You can also see there I tested dyes and stamps.
Awl
An awl helps you mark and make holes in your leather. You might use an all to discreetly place a pinpoint hole where you plan to make a larger cut for your hardware, and you can also use it with a little bit of force to puncture holes, but you are better off investing in a hole punch for that purpose.
X-ACTO Knife
The sharper, the better. Leather is deceptively difficult to cut, and if you can’t make a single clean cut, you might ruin the peace with what you are working on.
Cutting Mat
Buy some cutting mat so you don’t leave a bunch of cuts on your table. You can find a lot of double-sided, non-slip cutting mats depending on where you are working.
Stamp Tools
If you want to stamp a design, you will need leather stamp tools and a mallet with which to hit them. You will also need a transparent rubber punching board so that you have a surface on which to brace the physical impact from your stamping.
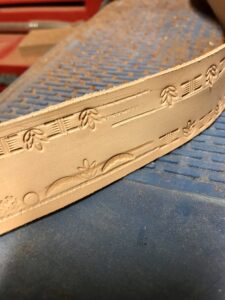
You can see in the image above I set aside a test strip of leather to practice stamping by hand and figuring out what patterns I liked most.
There are many leather stamp tools, and you must find the ones you like best. I have an alphabet and a set of floral-type patterns. You can also find Tandy Leather Factory Runic/Celtic Alphabet stamps, which were added to my cart as soon as I saw them.
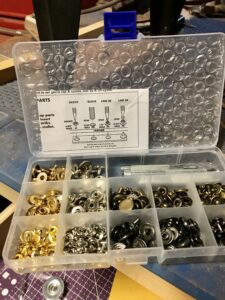
Rivets/Rivet Setter
Rivets and a rivet setter kit will help you join metal hardware on different leather projects like a leather belt.

Wool Daubers
Buy the biggest collection of wool daubers you can get because these are one-time use. You use each one to apply each deglaze, dye, or sealer.
Delgazer
You will need some form of deglazer to clean off the leather before you dye it.
Gum tragacanth
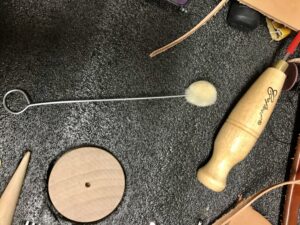
This is a product used to burnish the edges of your finished belt. You will need a wood slicker tool to go with it.
Sealer
After you dye your leather, you will need a sealer to protect it.
Dye
If you want to color your leather (which you will if it’s veg leather), find the dye you like best. If you want to give your belt an antique finish, I like the Tandy Leather Eco-Flo gel. I’ve used this finish on belts, headdresses, straps, and leather suitcases.
Step 1: Edging
Hold your leather edger tool at a 45-degree angle to the corner and slowly push it forward. This takes off a bit of the corner and gives you that nice rounded edge to your leather. The tool should do the majority of the work.
Below is the video series I watched when I first learned how to do leather projects:
You can see in the images below what the unfinished strip of leather looks like on the sides compared to the edged, dyed, and finished leather belt:


Step 2: Grooving
No, not grooving as in dancing but grooving as in using your groover tool cut a straight line along the length of the belt. This is not a requirement, but it’s a nice and simple way to add decorative lines on either side of your belt.
Step 3: Marking the Tailpiece
You can make a model or purchase templates that have precut tail pieces. If you make one or buy one, you can use it for every leather belt you make.
Make your markings on the tailpiece first. You could skip this part if you purchased one that was already done.
You will need to make a slot punch for the buckle with two holes on either side. This will be a separate piece of leather that comes together to make the tail.
Measure between the holes and between the holes and the slot. Mine was one ¼ inch between the two holes, 1 inch between the hole and the slot, and a slot punch measuring 1 inch.
You will need to round the final edge to your liking (think of the tailpiece on a belt that runs through the buckle and comes out the other end–it always has a curve).
Whether you had a premade tailpiece or cut one yourself, your next step is to place it on top of your leather belt strip and trace out the markings on the belt blank using an awl.
Step 4: Skiving the tailpiece
With 1-inch strips of 10 oz veg leather, it’s very thick and doesn’t fold well. So, with a pull skiver or edger to take down some of the bulk on the folded part of the tailpiece.
Skiving means laying the tool against the back of the leather and stripping off layers just like planing wood.
Turn the belt blank over, lay your tailpiece template on top and mark the edge of it with an awl, then skive from that point to the end. This will help the tail of the belt overlap more smoothly.
Tip: You can replicate this process much faster if you have a belt sander or even some extra sandpaper. I use a belt sander at home.
Step 5: Making your holes
Now it’s time to cut your holes. For the curved edge, you can cut it by hand with an X-ACTO knife. You can also get a 1 ½ inch half round strap end punch. With the end punch, line up your marks and hit them with a mallet on top of your cutting mat.
Similarly, you can buy a slot punch and do the same thing or cut it by hand.
Tip: If you don’t want to buy a slot punch, use the rivet setter and mallet to punch out either end of the slot, then remove the excess with your X-ACTO knife.
Then punch your four holes for the Chicago screws with a mallet and the pieces from your rivet setter.
On the opposite end, cut another rounded edge with the half-round strap end punch or with an X-ACTO knife. Then cut the holes (I use a 3/16 of an inch punch) and make the belt holes 1 inch apart, with a tail 3 ½ inches long from the last hole.
Step 6: Preparing your belt keeper
The “belt keeper” is the loop in between the Chicago screws that hold the end of your belt.
Cut a ½-inch wide strip for the keeper.
Fold your belt in half, wrap your small piece of leather around and make a mark where the two ends meet with your awl. Cut it to size.
Mark two holes on either end of your keeper. I use the awl to poke the holes through.
Now it is time to stitch the keeper ends together.
There are so many ways to do this, and the video below demonstrates a few of those:
You can also use a brass staple (I use brass staples on my belt).
- Slide your keeper onto the end of your belt.
- Slide your buckle through the slot punch and fold it over.
- Take one Chicago screw and screw the male and female ends together where the two holes line up closest to the buckle.
- Slide the keeper under the folded tip of leather in between the two sets of holes.
- Attach the second Chicago screw, male and female parts.
Now take a minute and admire how much your project suddenly looks like a belt!
Tip: If you want to cheat a little bit, you can buy hardware for the keeper instead of making one out of leather. This is often seen in women’s belts.

Step 7: Dying your leather
Fiebing’s makes dozens of leather dyes. So pick the color you want for your belt. You can have a red belt, yellow belt, blue belt, British tan, beige, light tan, and even aqua green.

If you want to get particularly creative with your leather belts, and I recommend doing this on a second or third attempt, you can car decorations or stamp decorations into your leather belt and use multiple leather dyes to create a brightly patterned product.
The video below shows how to paint and dye a leather belt:
Step 8: Applying edge kote
After you finish dying your new leather belt, invest in some Edge Kote. You can pick from multiple shades like mahogany, neutral, tan, brown, or black.
Stir the Edge Kote (do not shake it), and apply it in one-directional strokes to the edges of your belt. If you look at belts in the store, you’ll see that the edges are always a little bit darker, and this is why. This is what colors the edges with that darker medium gloss.
Let it dry completely, and then buff it gently with a smooth, soft cloth.
Step 9: Using gum tragacanth
Once you have dyed your leather belt and applied your Edge Kote, it is time to really slick down the edge. With gum tragacanth and a wool dauber, gently coat the edges (careful not to get any of the gum tragacanth on the top or bottom of the belt).
Wipe away any globs or excess. Take your wood slicker tool and run it quickly over the edge.
Note: It will get hot from the friction. Move gently in sections no longer than 5 inches at a time, and move quickly. Apply enough pressure to get a nice, shiny finish.
Work your way around the entire belt. Don’t forget the ends. Once that is done, you can look it over and see if you like the feel or want to give it another coat.
Step 10: Protecting your new belt
Now it’s time to diminish your wool dauber supply once more with an application of resolene. At this point, you are probably anxious to just wear your new belt; this is about the point where I start to get overwhelmed and just want to be finished. However, resolene is important because it is water resistant and makes it easy to protect your new leather belt; it won’t peel or crack, it makes it simple to clean your belt, and it means you don’t have to worry about getting caught in the rain.

Follow the instructions for your application. You must wait until the leather belt is completely dry before using it. With one-directional strokes, apply the resolene across the entirety of your new belt and leave it out to dry.
FAQ
Question: How long should my leather belt be?
Answer: Measure your waist where your pants generally rest and add 10 inches.
Question: Do I need any power tools to make a belt at home?
Answer: Not at all; you can use hand tools for every step in this guide.
Question: How thick does a leather belt have to be?
Answer: You can choose the leather that is around 1/8 of an inch thick which translates to weighing in between 8 oz and 10 oz. However, it comes down to personal preference.
Question: What type of leather is best for making a belt?
Answer: Again, this comes down to personal preference, but vegetable-tanned leather generally is wear-resistant, comfortable, and durable. It also comes in various thicknesses so you can choose the size you prefer.
Bottom Line
Now you have all the tools you need and some ideas for making a leather belt at home. Once you learn a few key tricks and get a handle on using your hand tools, it becomes easier and easier.
Looking for more interesting projects? Check out: