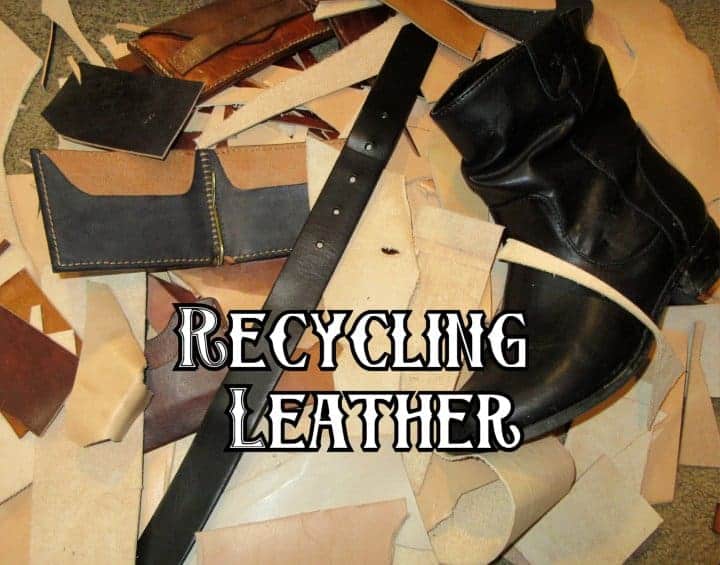
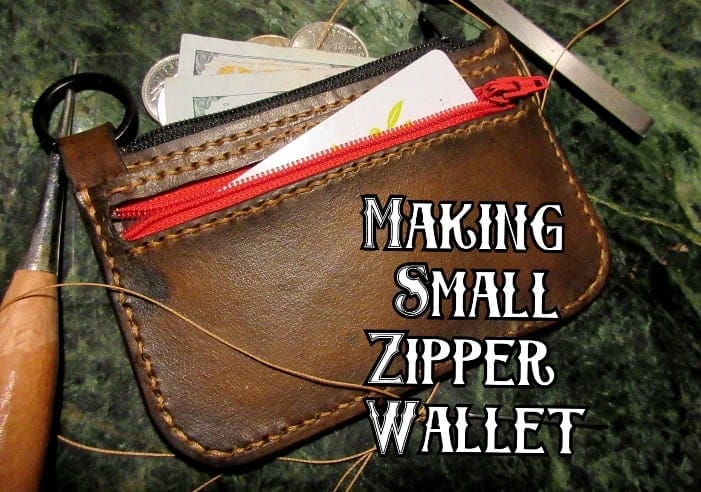
Make a Leather Keychain Zipper Wallet
For this wallet, I wanted to make a small, thin wallet that could hold coins, cards and cash. This is how I came up with this design to make a small zipper wallet. You can purchase the template here at our shop for an easy follow along or just use this guide to make your own.
You also can avoid using the key ring area if you plan on using it as a regular wallet. If desired you can use the card slot pocket for the front and back.
Since I have the design let’s get into how to make a leather keychain zipper wallet.
Steps to make a leather keychain zipper wallet
To start I will have my design cut out using heavy painters paper. This can be added to are list of ‘how to make a leather cutting template’ but it isn’t as great as the ones listed. But it worked out much better than regular printer paper.
I drew up the design and used this paper as my template so along the way I could make changes if needed. But let’s go over the steps to making this wallet with a template
Step 1: Making the pieces
To begin we will cut out all of our pieces from the template. Once you have all of the pieces cut out from the template, you can place this onto your leather and begin tracing.
Use an awl to scratch into the surface of the leather to make the outline stand out. Once every template has been traced you will want to use an X-Acto knife and/or rotary blade to cut out your pieces.

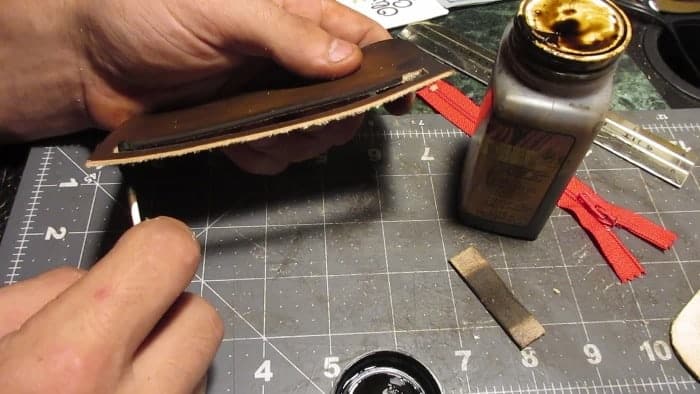
Now that your pieces have been cut out of the leather you will want to sand down the cuts. This will help to smooth out any fraying pieces or cuts with errors in them. Use 220 grit or any high grit sandpaper to smoothen out your cuts.
Place the card pocket/s against the main pocket to smoothen all the edges equally.
You don’t have to go too crazy around the sides of the wallet as we will sand this down again after stitching the wallet together. Mainly focus on the zipper cut outs, as they tend to fray a bit in the corners.
Step 2: Dyeing the leather
If the leather you are using is not already died, you will want to do this now before adding any zippers. This way you don’t end up dyeing your zipper fabric.
We have a ‘2 ways to dye leather’ guide you can check out for more detail, but we will briefly explain.
Use a couple cotton balls or wool daubers (preferably), rubber gloves and something to cover your table. This dye will dye your table and even skin very easily so you may want to cover up when dyeing.
To start I am using Fiebing’s dark brown and a couple cotton balls where I will rub the dye in in a circular motion. Give the dauber or cotton ball light pressure when placing onto the leather after you soak up some dye. As it is running low while you are rubbing it into the leather, apply more pressure to release the dye.
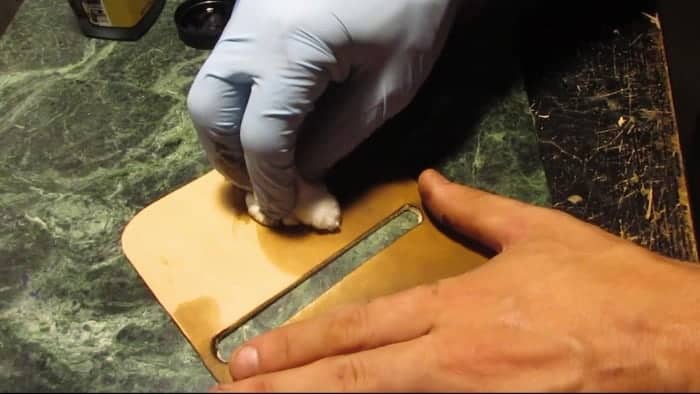
For this project, I wanted to darken the edges a bit so I went around the edges a few extra times. After running the cotton ball around the edges I will add a coat throughout the whole piece. This way the color change won’t be so abrupt.
Allow the dye to dry for 15-20 mins or until fully dried.
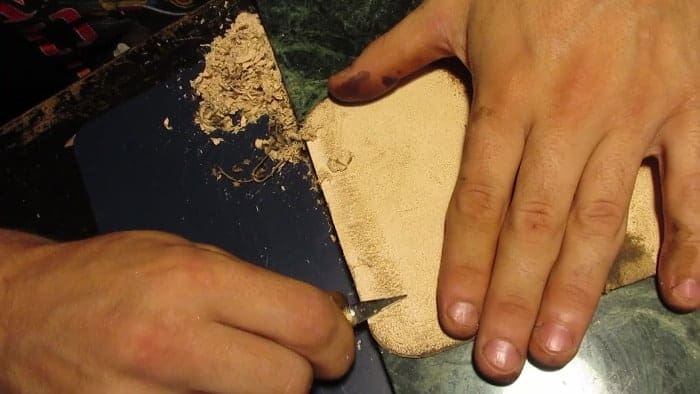
Step 3: Skiving the back edges
For this wallet I wanted the thickness to be very slim, and this is where skiving comes in.
You can also use thinner leather for the pockets to help with that, but skiving is pretty universal in leather crafting.
When skiving, it is very important to have a skiver tool for very nice cuts into your leather. But I do not have one at the moment so this is where I used a new razor on my X-Acto knife and ran it across the edges.
This can work very well, but will take much longer than using a skiver. It can also be dangerous as it can be very easy to cut yourself or through your leather piece.
This has happened to me a decent amount of times, but I still haven’t learned my lesson yet.
I found that it works best when you place the leather on a straight edge of a table or raised surface and run the blade over the leather at a small angle. Having a sharp angle facing into the leather will easily slice the leather.
You will want to do this around all the edges of the leather pieces and inside the zipper cut outs. This will help sink the zipper into the leather a bit more.
Step 4: Attaching zippers
I have an article on ‘how to sew a zipper to leather’ you can check out for more detail, but I will briefly explain.
To start we will want to make sure the edges of our zipper cut outs are finished. This will be very hard to do once the zippers are stitched into place.
So to start on the edges, make sure they are sanded down to your liking and dyed enough. If the edge is not dyed you can use a Q-tip to dip into the dye and run this along the edges.
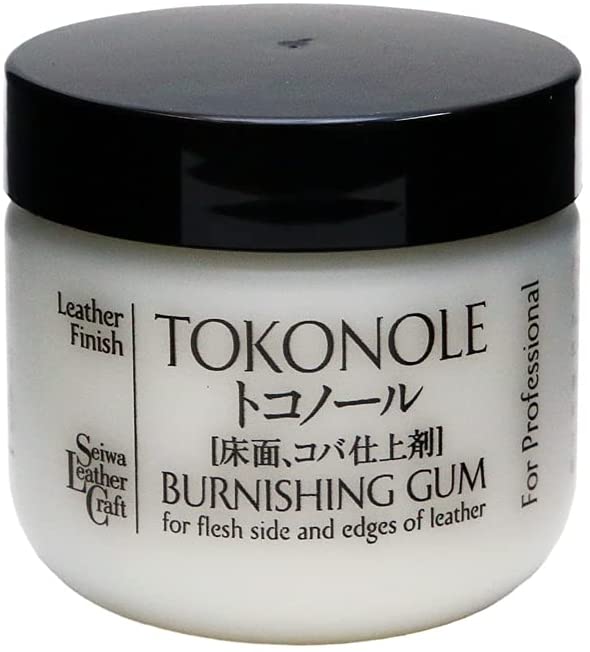
Once the dye has dried you will want to rub in Tokonole or gum tragacanth. Tokonole is definitely the best option, but they both are basically edge finishers. Rub this into the edge until the tokonole starts to soak into the leather. Now that most of it has soaked in you can use any type of edge burnisher to slick out the edge.
I am using the Dremel burnishes which help a lot for these small areas, but hand burnishes are very cheap. Rub the burnisher along the edge until it starts to look very slick an almost a bit rounded.
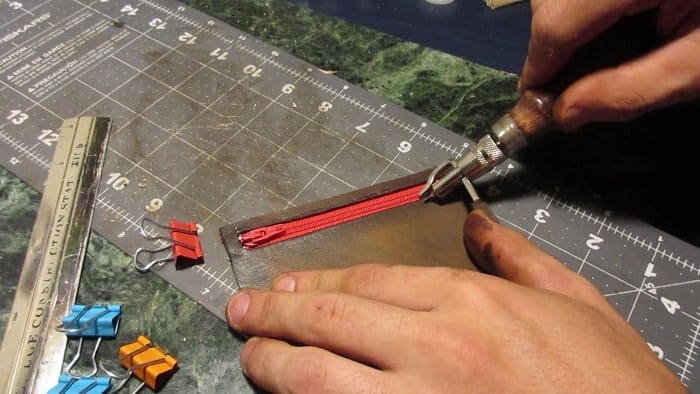
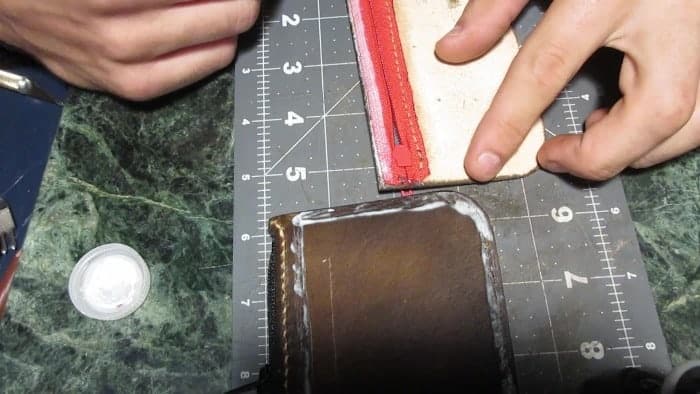
After doing this around all the edges where a zipper will sit you can now apply the zipper with some glue.
For the card (front) pocket, I cut the zipper thinner a bit so it didn’t stick out the top of the leather piece. You will also want to cut back the zipper till it no longer sits past the leather pieces.
I usually place it in the slot, mark off at the end of the leather and cut a bit extra of the zipper. This way I know it will not sit outside of the leather.
Now that the zipper has been cut to fit, you can start applying glue around the zipper hole and the zipper. I use Fiebing’s leathercraft cement as it doesn’t have a strong smell and doesn’t take as long to dry. But you can use any contact cement or strong glue on leather projects.
Then place the zipper into the area and it might help to flip the piece over to check where the zipper is sitting. Hold the piece down and use the teeth to move around the zipper until it is sitting straight inside the hole.
Use binder clips if they can reach the zipper, if not just rub the zipper into the leather and place a weight on top.
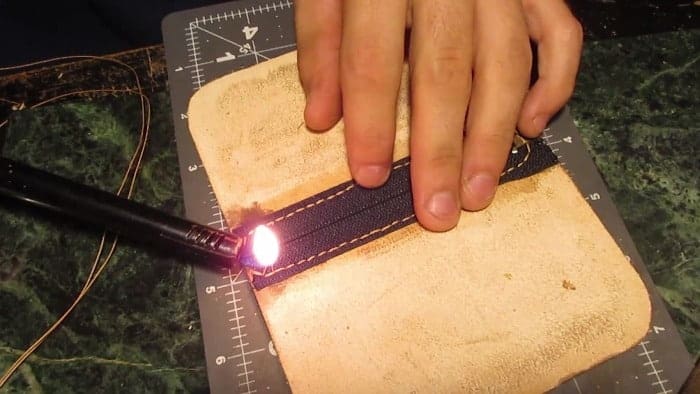
Now that the cement has dried we will stitch the zipper to the leather so it lasts a long time.
For the front pocket, I will saddle stitch below the zipper only first. We will stitch above the zipper also but not until we attach it to the main body piece.
For the main pocket, you want to check that the front pocket/s will not interfere with the stitching. If you use the template, 1/8” stitching from the edge should work perfectly.
Stitch both sides for this main pocket. Make sure for both main and face pockets you avoid going all the way to the edge. Since we will be stitching around the entire wallet, you will want to keep some space open for that stitching.
Now that the zippers are in place we will work on the keyring attachment.
Step 5: Attaching Keyring
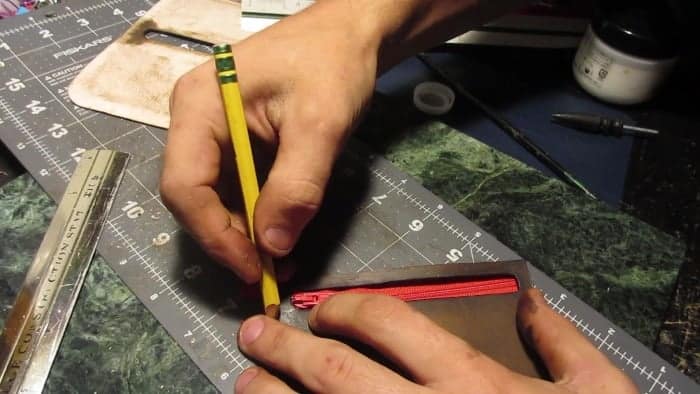
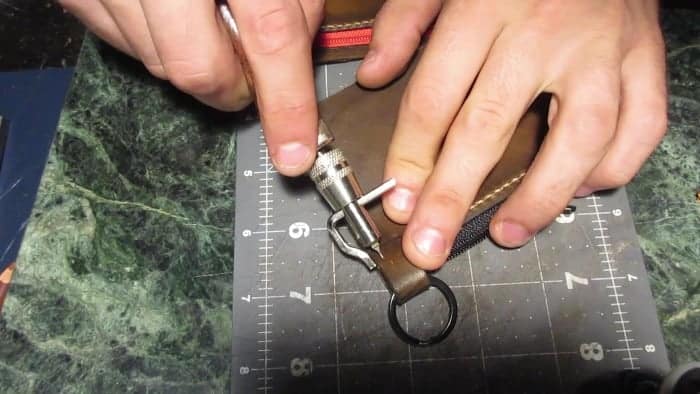
To make this a keychain wallet, we have to add the key ring somewhere. For this you will want to have a small rectangle piece to attach the ring to.
You can place this wherever you see fits, but I measured this out so it could be placed right by the main pocket zipper.
So for this I folded the main piece together and placed the rectangle with the keyring attached to the desired area. I made sure the key ring would have room to move then marked where the piece would sit with an awl.
You will definitely want to make sure this piece has been skived as it will sit under one or two zippers.
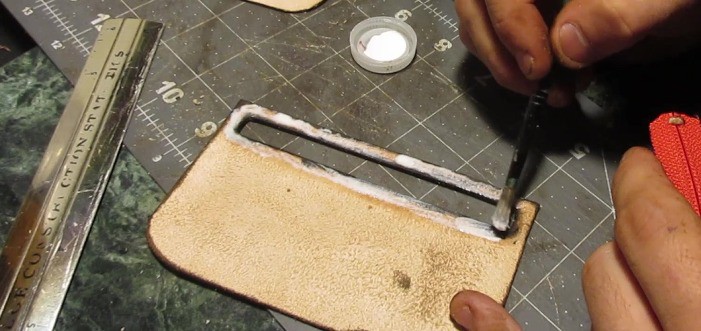
Now that the placement has been marked, scratch away some of the main body surface where the keyring piece will sit.
Apply cement to the body and a small amount to the key ring piece. Place keyring onto the piece and place it in position.
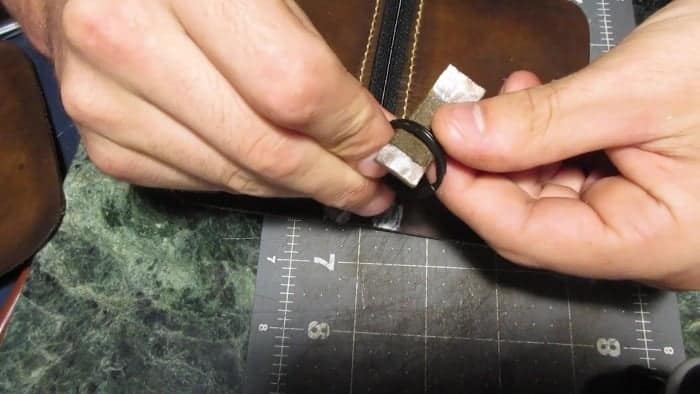
This will be hard to clip together so you may have to just hold or hammer it down until it the cement dries.
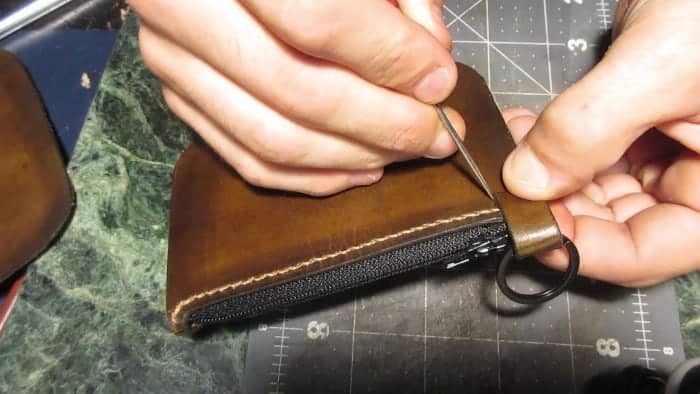
After making the wallet I realize I could’ve put the key ring on then stitched the main zipper together. This way the the stitching would have went straight across the keyring piece.
But instead I used a single stitching chisel to punch three holes into the piece on each side.
When punching these hole, place a piece of leather in between to avoid chiseling through the other side.
Then stitch two of the holes together and burn off the excess thread. The third hole is sitting at 1/8” from the edges which is where I usually put my stitching.
This way when I am coming to the end of stitching the whole wallet together I will use these last holes and stitch them together.
But for now, the key ring should be pretty secure to the each side of the main body.
Step 6: Stitching wallet together
Now we can add the pocket to the face of the wallet and stitch the whole wallet together.
For this I will scratch away around the edge of where my pocket will be glued to. When you scratch away the smooth surface it will help secure the bond of the cement.
Apply cement around the pocket and the scratched surface of the main body and put these pieces in place. Use binder clips around the edges to keep the pocket in place while it dries.
Before we stitch the whole wallet together you will want to go back and stitch the top area of the pocket/s once it has dried to the main piece. Use the stitching groover to place a straight line then chisel out the stitching holes.
Saddle stitch across this piece and remember to avoid going to the edge. Try to go the same length as the stitching on the bottom of the zipper.

If you are adding two pockets to this, you will repeat this step for the other side.
Next you will want to glue around the inside edges of the main body. Then do the same thing, apply binder clips and wait till it dries.
This wallet is just about ready to be stitched up.
Before stitching I will sand around the edges to even them out a bit more. This will remove any glue around your edges and make your pieces flush. It will also help when you start to groove around the edges for your stitching.
Now groove out the stitching line, and use the stitching chisel to punch holes for your thread. If you find it hard to punch through all the layers, you may want to consider drilling holes through the piece.
I have punched holes through the side of projects and it is very disappointing getting that far just to ruin the piece at the end. If you find this to be a problem, try going slow by punching the chisel through until you can see where the chisel will come out of.
If it is not in a good spot, try taking the chisel back out and holding it at a bit of an angle.
Once this is complete you can go and saddle stitch the whole wallet together.
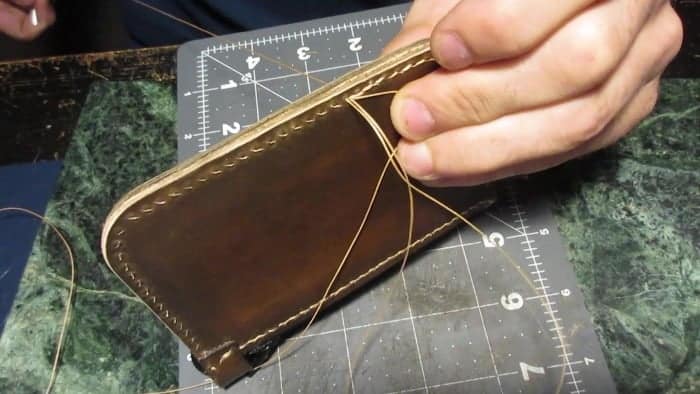
As you get to that keyring hole you will want to go through both of these holes with your thread a couple times. This will help tighten that bond as the keyring will take a lot of stress if it is dangling with keys.
Step 7: Finishing touches
Now that your wallet is has been all stitched up, you will want to use a bone knife to scrape away the excess glue. This knife will help open up all the pockets and allow to get the full size of the pocket.
Lastly, your edges probably are all sanded down and look a little dull. Use that Q-Tip method to re-dye the around the edges of your leather.
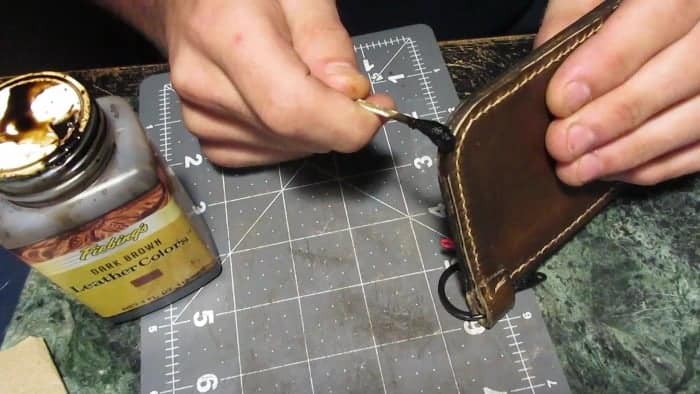
Once the dye has soaked into the leather, apply Tokonole around the edge and rub it into the edge. After it soaks in grab your burnisher tool and smooth out the edges.
You can apply some sealants to the like Fiebing’s acrylic sheen or Eco-Flo satin finish or saddle soap if you have not applied this yet.
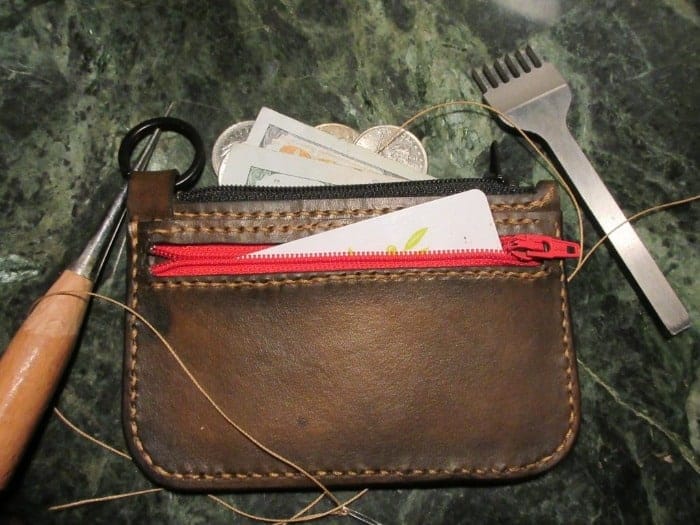
Finished keychain zipper wallet
Hope this helped give you an idea on how to make a leather keychain zipper wallet. Or if you purchased the template, hopefully this guide could help you finish off this project.